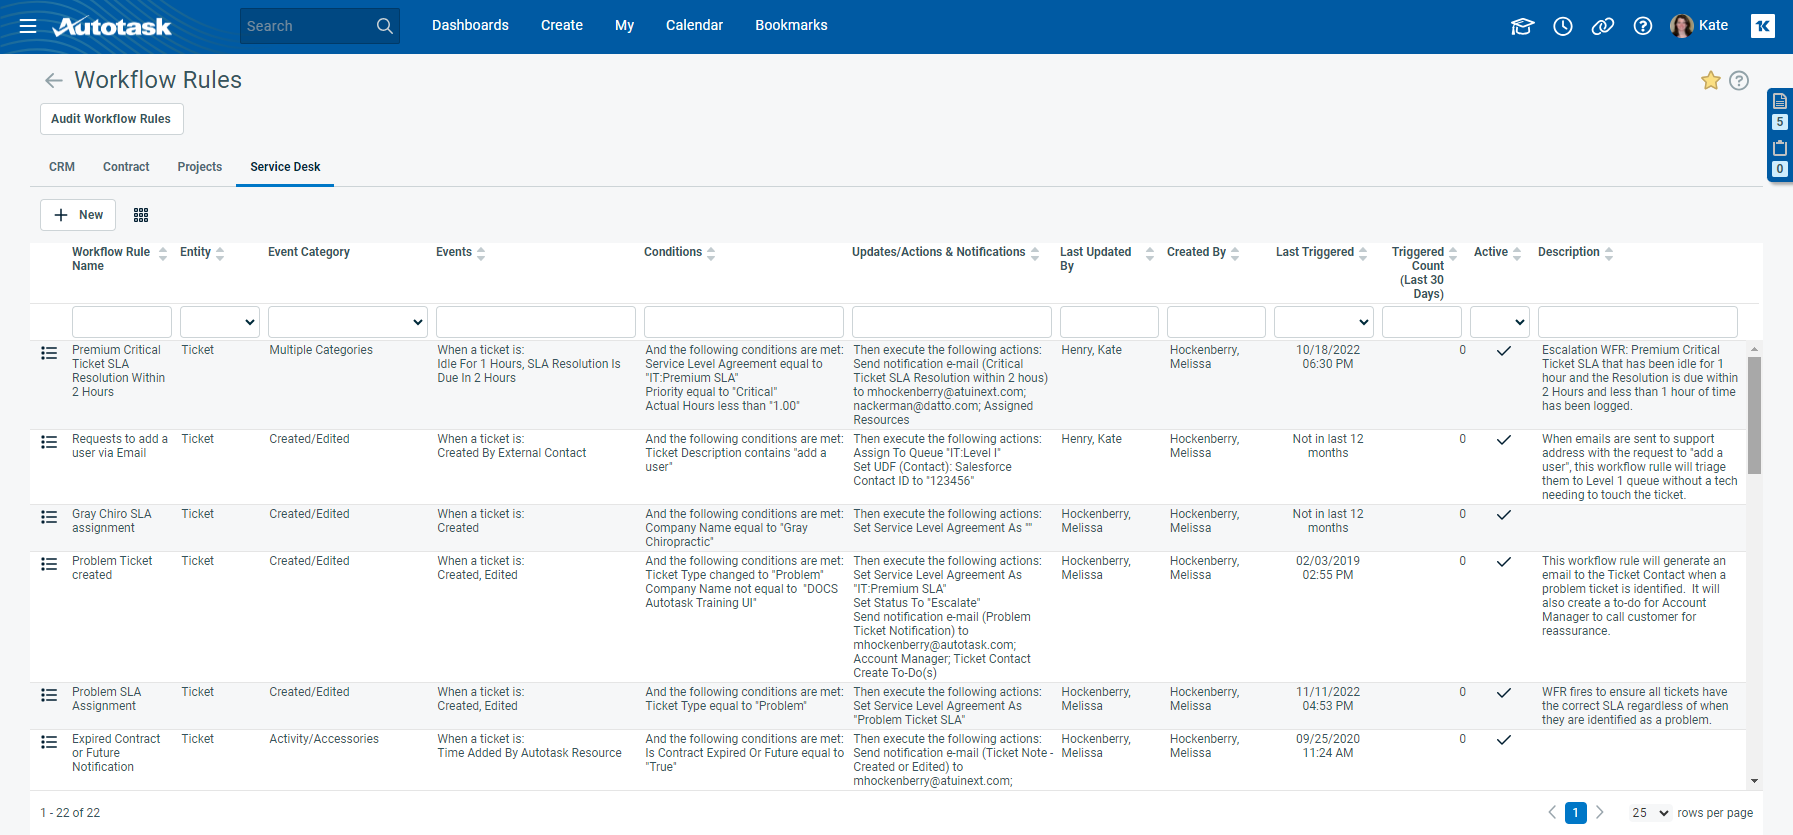
The Workflow Rules page
PERMISSIONS Security level with Admin permission to configure Workflow Rules. For Service Desk workflow rules only, Admin permission to configure Service Desk (Tickets). Refer to Admin security settings.
NAVIGATION Left Navigation Menu > Admin > Admin Categories > Automation > Workflow Rules > Workflow Rules
About the Workflow Rules page
Workflow rules are created and managed on the Workflow Rules page. At the top of the page, you will see the Audit Workflow Rules button. Clicking this button will launch an audit of the workflow rules on all tabs. Refer to Auditing workflow rules.
The page contains a tab for each entity workflow rules are available:
- On the CRM tab, you manage Opportunity, Quote, Sales Order, and Device workflow rules
- On the Contract tab, you manage Contract workflow rules
- On the Projects tab, you manage Project and Task workflow rules
- On the Service Desk tab, you manage Ticket workflow rules
The features on all tabs are identical. To see an example of each type of workflow rule, refer to Workflow rule examples.
Managing the number of workflow rules
By default, each partner can create up to 200 workflow rules in total. It is easy to reach that number, so it is important to manage your workflow rules using the following tools:
- You can run an audit of all your workflow rules to find out which ones are not being used or simply won't fire. Refer to Auditing workflow rules.
- You can consolidate multiple workflow rules into one. Refer to About In List and Not in list operators and Notification section.
NOTE If you believe you need more, please engage our Professional Services group to analyze your business needs. They can redesign your workflow rules to be more efficient so you can stay within the limit.
The features on all tabs are identical. To see an example of each type of workflow rule, refer to Workflow rule examples.
Managing workflow rules
For the field descriptions of workflow rules, refer to Adding, editing, and copying workflow rules. The workflow rules table contains a number of system fields and calculated fields that do not appear on the New/Edit Workflow Rules page. Some appear by default, others have to be selected using the Column Chooser.
The columns on each tab are managed separately. To customize the table, do the following:
- Click the column chooser icon
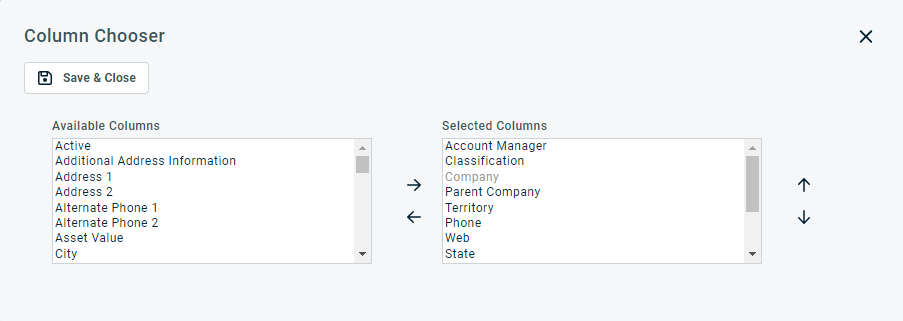
 above the search results. The Column Chooser page opens.
Columns appear either in the Available Columns or the Selected Columns panel.
- Double-click a column name or select one or multiple columns and click the left or right arrow to move columns to the other panel.
- To change the display order of the columns, select one or multiple columns in the Selected Columns panel and click the up or down arrows.
NOTE Top-to-bottom order in the Selected Columns list becomes left-to-right order on the Search Results list.
- Click Save & Close.
To find a specific workflow rule, you have the following tools:
-
Next to many column headers, you will find a sort icon
 . Click to sort the list in ascending or descending order.
 -
The top row in the table is a filter row. Enter a string into one or more fields, or select an option from the drop-down menu. The search will find all workflow rules that contain the search string.
The Events, Conditions and Updates/Actions & Notifications columns of each workflow rule read like a sentence that summarizes what the workflow rule will do when it is triggered.
You can also select the Description field on the table. Refer to Selecting the table columns to view.
To create a new workflow rule, click New at the top of the table. Refer to Adding, editing, and copying workflow rules. Also refer to Workflow rule attributes, operators, and field types.
| Option | Description |
|---|---|
|
Edit, Edit [Entity Name] |
Puts the selected row into Edit mode or opens the Edit <Option> dialog. The fields that can be edited are usually the ones you populate when you create a new list item. Make your changes and click Save, or Cancel. NOTE On some pages, you may not be able to edit System options. |
|
Activate/Inactivate, Activate/Inactivate [Entity Name] |
New options are active by default.
NOTE Sometimes, the association that prevents inactivation is not obvious. For example, to inactivate a ticket status associated with Incoming Email Processing, you must select a different one first. |
|
Copy, Copy [Entity Name] |
Creates a copy of the selected option. The name is the same as the original, followed by (Copy). |
|
Delete, Delete [Entity Name] |
The ability to delete an option is severely restricted. List options cannot be deleted if:
IMPORTANT To preserve data integrity, Autotask prevents deletion of entities that have dependent entities or are referenced elsewhere! If you are unable to delete an entity, you should inactivate it to make it unavailable for use. |


