Managing your profile
PERMISSIONS All Users
NAVIGATION Click your name in the upper right corner of the navigation bar (Dashboard users will be taken to the Settings page, instead)
NAVIGATION My > Miscellaneous > Profile
The My Profile page lets you manage how you appear to and communicate with other Autotask users. You can also configure and manage certain integrations. To open the page, use the path(s) in the Security and navigation section above.
When you open your profile, the Info tab is selected.
NOTE Some changes to your profile page require you to log out and back in for them to take effect.
Left panel
The photo or placeholder image will be displayed on your profile wall, in the Co-Workers list, and next to all of your wall posts throughout Autotask. It also appears next to your ticket time entries and notes. To manage your photo, do the following:
- Click the Change Photo link below the placeholder image or the existing photo. The Change Profile Photo window will open.
- Click Browse and select a photo. The image file must be .jpg, .gif, or .png format. The maximum file size is 2 MB.
- Click Upload. The image will be re-sized to maximum width of 200 pixels.
News Feed
The news feed consists of the wall posts of co-workers and teams you chose to follow. Refer to News Feed.
Co-workers
To learn more about and connect with your co-workers, go to the Co-Workers list. Open this page to see a list of all people in your company who are using Autotask, their titles, maybe a photo, and their latest wall post.
The list is alphabetical by first name so you can look for that guy named Steve that sat next to you at the last company meeting. And there might be a photo, in case you're not sure of his name; but unless your company requires a photo, Steve does not have to post one.
If you want, you can choose to follow any co-worker:
- On the profile sidebar, click the Add More link under Co-Workers. A list of resources will open.
- Find the co-worker in the list. Hover your pointer anywhere in their row and click the Follow button when it appears.
Want to know more about a co-worker before you add them to your news feed? Click a co-worker's name or photo to visit their profile for more detailed information and to check the conversations on their wall. Refer to Co-Workers.
NOTE Your company may have limited whom you can see in Autotask. Refer to Limiting resource visibility.
Team walls
You can also chose to follow teams or even create one yourself. Click Add More to open a window where you can start or stop following other teams. Click a team name to open the team wall. Refer to Team walls.
Tabs on the main panel
Your profile will open to the Info tab. On this tab, you view and manage the information that is available about you in Autotask.
- To manage your user settings, click the Settings button at the top of the tab. The Settings page will open. Refer to Settings.
- To modify your user information, click Edit. You can change the following information:
| Section |
Description |
|---|---|
|
Name & Title |
First Name and Last Name are required, and added when your user account was set up. |
|
Contact Info, About Me, Biography / Education, Work History, Awards/Honors |
Track additional phone numbers, extension, email addresses, and social media URLs and reveal as much about your personal and professional life and interests as you are comfortable with. |
|
Skills / Certifications |
Permission to maintain and update your own skills profile can be granted to all users in your company or on an individual basis. If this feature is enabled for you, you will see a Skills / Certifications section on your Profile page. You are able to maintain your skills and skill levels, educational degrees, and certifications and training. Check any that apply and, for skills, also select a skill level. Refer to Allow Resource to Edit Skills. If desired, complete the Details field for the skill, certificate, or degree to provide clarification. An email notification outlining the skills you updated is automatically sent to your department leads and timesheet approvers. This notification gives supervisors and managers the opportunity to review and edit the changes you made. |
TIP The information in your profile is shared with all Autotask users in your company, so enter only information you don't mind sharing with co-workers. If you make changes to your profile information, your timesheet approver will receive a notification that you have updated your skills profile.
To let your colleagues know what you are working on, click the Wall tab. The wall displays any posts you entered, and comments other users made. This is what other users who follow you will see when they click your name in the sidebar.
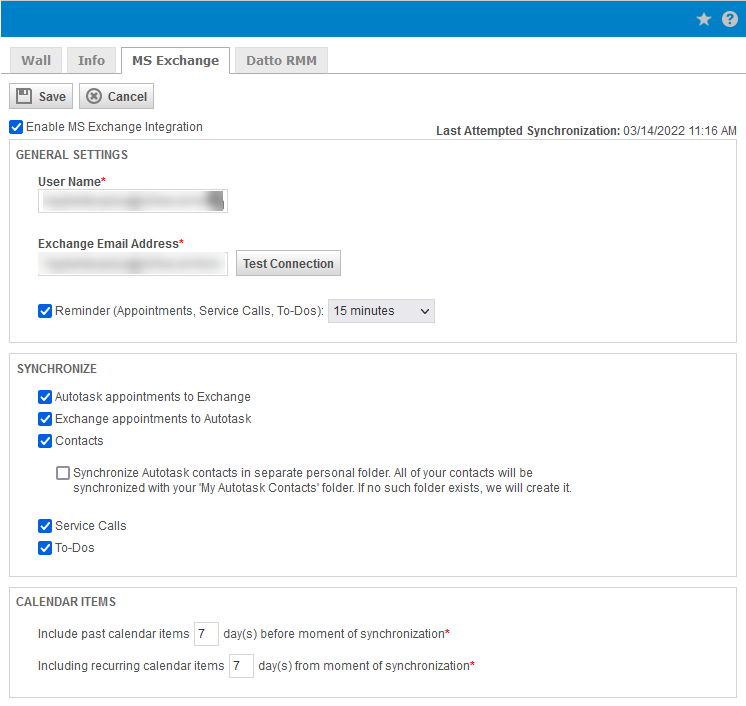
If your Autotask Administrator enables the MS Exchange Extension for you, the MS Exchange tab appears on your profile and allows you to configure the specific items that you want to synchronize between Autotask and your MS Exchange applications.
- Enter the following information:
| Field | Description |
|---|---|
| Enable MS Exchange Integration |
When this check box is selected, the synchronization between Autotask and MS Exchange will run at periodic intervals set by your Autotask Administrator. Check this box after you are finished configuring the settings on this page. |
| General Settings | |
| User Name | Enter your MS Exchange email credentials. If you do not know this information, contact the information technology (IT) person who is responsible for email at your organization. If your Exchange server is hosted by Office 365, enter your full Office 365 email address into the User Name and Exchange Email Address fields. NOTE If your Autotask Administrator has configured the MS Exchange Extension to use a Synchronization Account when synchronizing data, you will not need to enter your password and the field is grayed out. |
| Password (on-prem only) | |
| Exchange Email Address | |
| Test Connection |
After you enter the General Settings, click Test Connection to ensure the settings work. Autotask will test the connection to the MS Exchange Server and verify that the credentials worked, or return an error if they failed. The connection will also be automatically tested when you click Save after you are finished adding all required information on this page. For information on troubleshooting Office 365 Exchange sync clients refer to If testing the connection to Office 365 Exchange fails. |
| Reminder (Appointments, Service Calls, To-Dos) | Set the reminder options for calendar items in MS Outlook. By default, reminders for Autotask items copied to MS Outlook are set at 15 minutes. To change this time interval, select a different reminder period from the drop-down list. If you would like to disable reminders for copied items completely, clear the Reminder check box. |
| Synchronize |
|
|
Select the items you would like synchronized between Autotask and MS Exchange. For items you select here, all original information (time and detail) transfers over during the first synchronization after the item is created. After that, changes to existing items made in Autotask are always synchronized back to MS Exchange, and changes made in MS Exchange to items created in MS Exchange will sync back to Autotask. |
|
| Autotask appointments to Exchange | Select this option (if available) if you want Autotask appointments transferred to MS Exchange. |
| Exchange appointments to Autotask | Select this option (if available) if you want MS Exchange appointments transferred to Autotask. |
| Contacts |
Select this option if you want to transfer contacts from Autotask to MS Exchange. By default, you will be able to sync contacts where you are the account owner or opportunity owner. Refer to Restrict contact integration by account manager and opportunity owner. NOTE If you are an account team member, Exchange does not sync contacts from that account. You must be the Account Manager or owner of an Autotask opportunity associated with an account in order to transfer the account's contacts. |
|
Synchronize Autotask contacts in separate personal folder... |
If you would like to create a separate folder in MS Outlook for Autotask contacts, select the Synchronize Autotask contacts in separate personal folder check box. If this check box is not selected, your Autotask contacts will be added to your personal contacts folder. |
| Service Calls | Select this check box (if available) if you want service calls transferred from Autotask to MS Exchange. In your mail application, service calls will appear as appointments. |
| To-Dos | Select this option to transfer Autotask to-dos to MS Exchange. To-dos appear in your Outlook task list or your Outlook calendar, depending on the view status of the to-do. Refer to How MS Exchange items are synchronized. |
| Calendar Items | |
| Include past calendar items # day(s) before moment of synchronization | Select the number of days (1–30) into the past you would like the extension to look for items when synchronizing information. The default is the number of days configured by your administrator. |
| Including recurring calendar items # day(s) from moment of synchronization | Select the number of days into the past and future (1–30) you would like the extension to look for recurring items when synchronizing information. The default is the number of days configured by your administrator. |
- Click Save. Autotask will test the connection to the MS Exchange Server and verify that the credentials worked, or return an error if they failed.
NOTE If you changed the Exchange email address or domain, all items will automatically be re-synchronized when you save. If the synchronization process is running, you will receive an error and will have to try again after the synchronization completes.
During the configuration of a user's MS Exchange Integration profile, you have the opportunity to test the connection to the Office 365 Exchange server. If this test fails, and you are sure that the username and password you entered are correct, you can run a tool Microsoft provides here: https://testconnectivity.microsoft.com/.
- On the sidebar menu, select Office 365. Under Microsoft Exchange Web Services Connectivity Tests, select Microsoft Exchange Web Services Connectivity Tests.
- Click the Synchronization, Notification, Availability, and Automatic Replies tile.
- Complete all required fields.
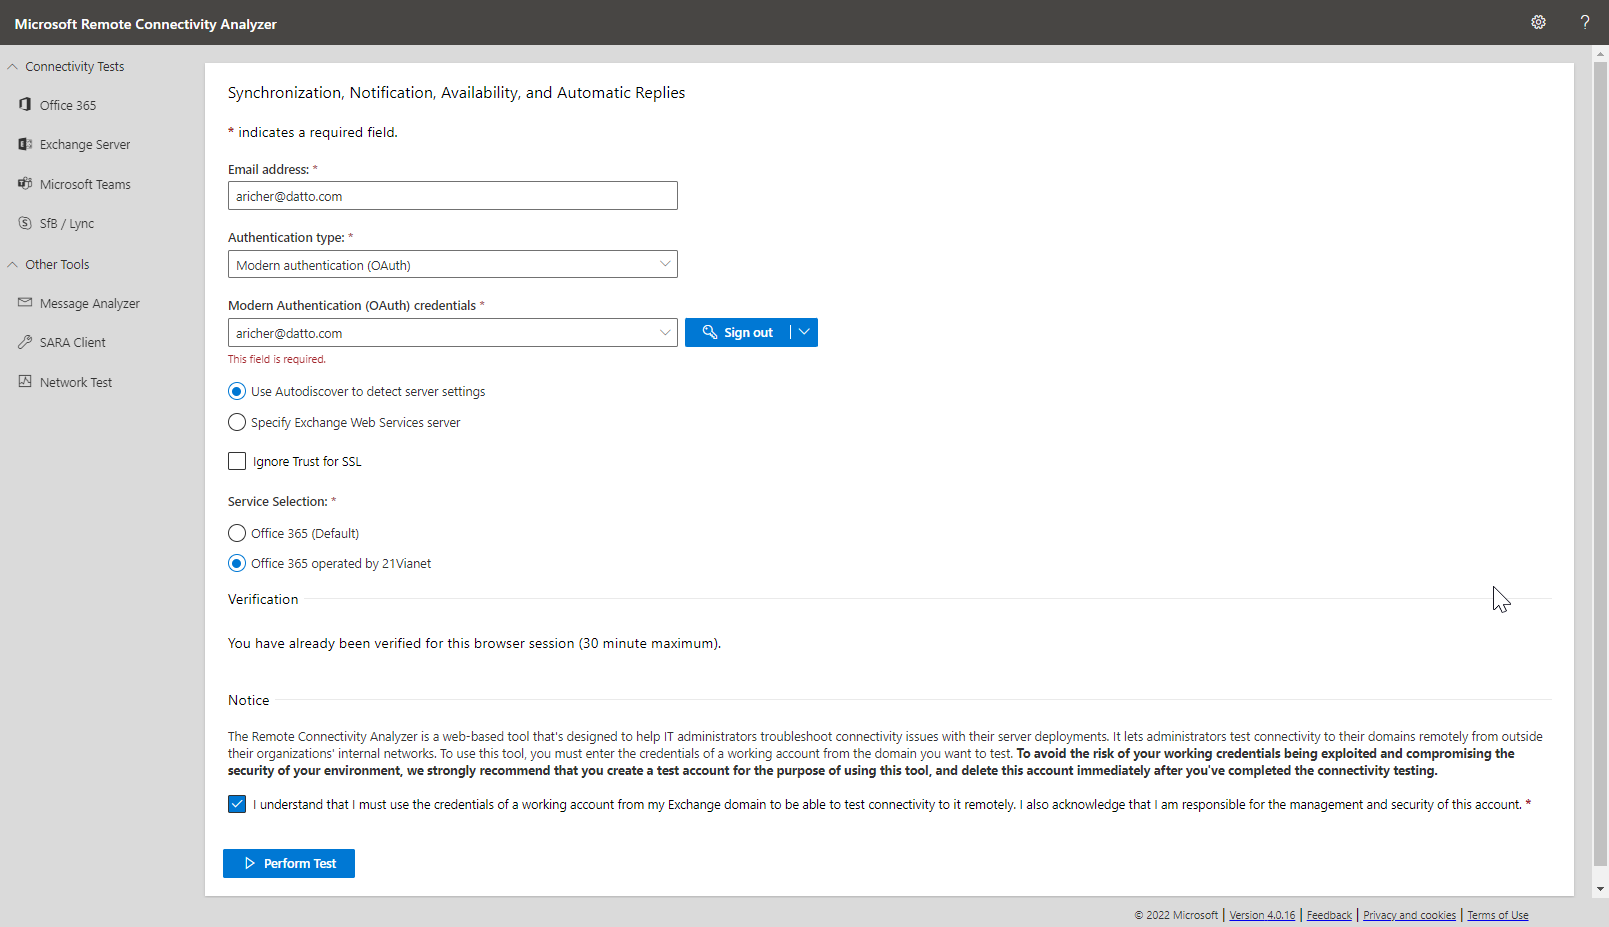
- Click Perform Test. A message will let you know the test is running.
- Expand the test results, even if you see a Connectivity Test Failed message. For Autotask - Exchange synchronization to work, only the first four tests must succeed:
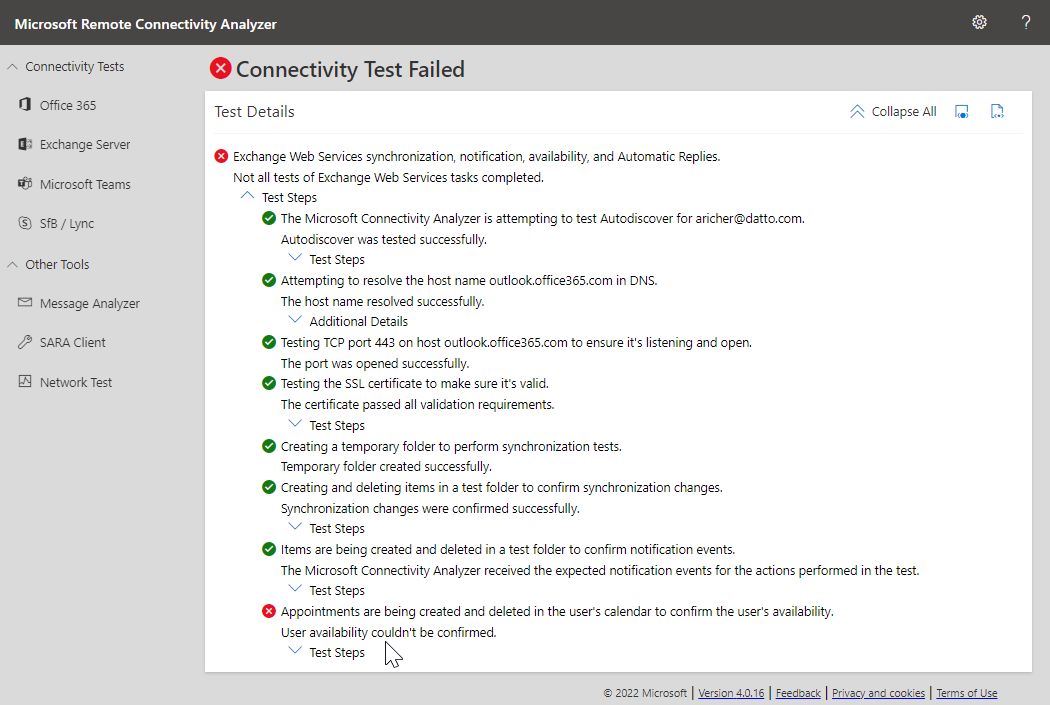
Any issues with the first 4 tests must be resolved by your Autotask administrator in Office 365.
If a user with Admin permissions for Kaseya Integrations has enabled and configured the integration with IT Glue, all users will see the IT Glue tab on their user profile page. If you have an IT Glue user account, you now have the option to connect it to your Autotask account.
NOTE You can also connect from the IT Glue Checklists tab on the organization accessory tabs. Refer to The IT Glue Checklists tab.
To connect to IT Glue, do the following:
- On the IT Glue tab, click Establish Connection. The IT Glue log in page will open.
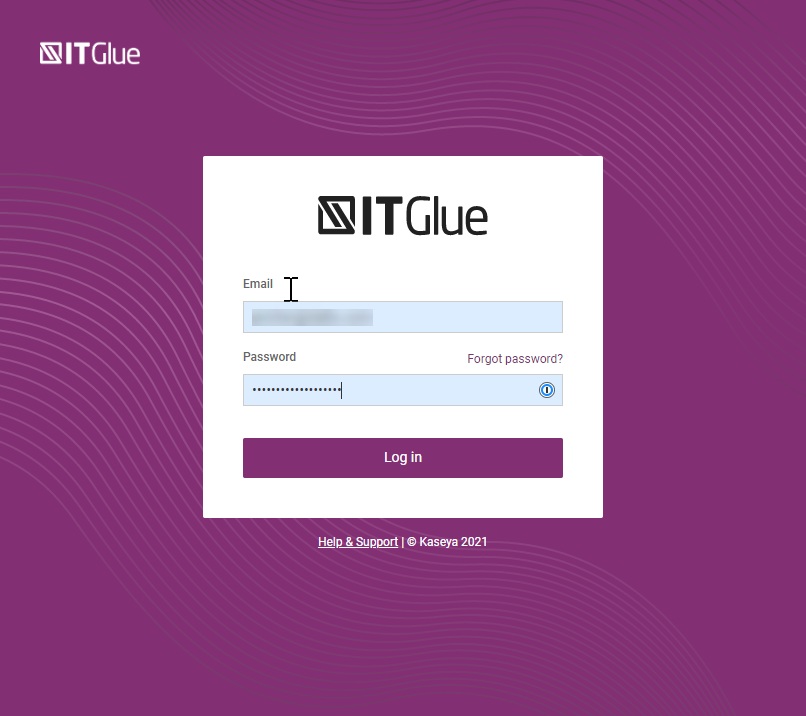
- Enter your Email and Password and click Log in. A dialog window will open.
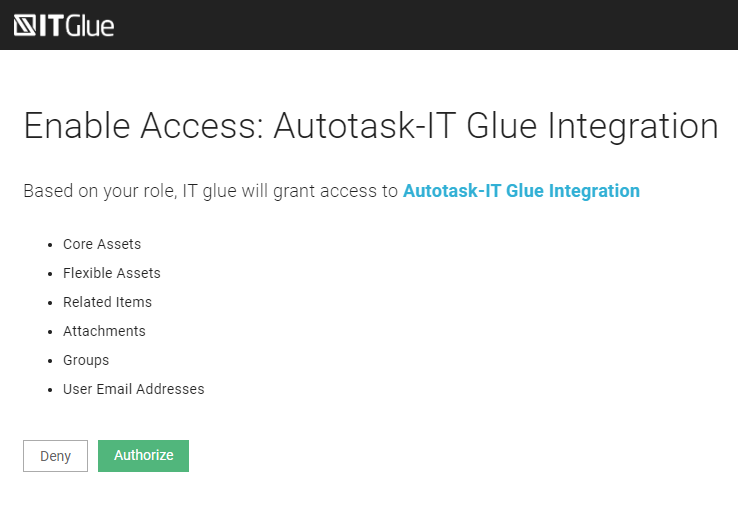
- Click Authorize. The IT Glue app will open.
- In Autotask, a dialog window will confirm that your profile is now connected to an IT Glue user.

To disconnect your user account from IT Glue, click Disconnect.
For information on the features that are available once the IT Glue integration is enabled, refer to About the integration.
You can unlink your Autotask user profile and Datto RMM user account on the Datto RMM tab:
- Click the Unlink Datto RMM Username button.
Also refer to Unlink your Autotask user profile from your Datto RMM user account.

