Smart Accounting Hub for QuickBooks Online (QBO) invoice, purchase order, or expense report search
PERMISSIONS Security level with the QuickBooks Extension Admin setting enabled and API impersonation permissions.
NAVIGATION Left Navigation Menu > Admin > Extensions & Integrations > Smart Accounting Hub > Settings > Invoices
NAVIGATION Left Navigation Menu > Admin > Extensions & Integrations > Smart Accounting Hub > Settings > Purchase Orders
NAVIGATION Left Navigation Menu > Admin > Extensions & Integrations > Smart Accounting Hub > Settings > Expense Reports
The My Invoices page is dedicated to manually searching for one or multiple invoices for the purpose of syncing or re-syncing, if necessary.
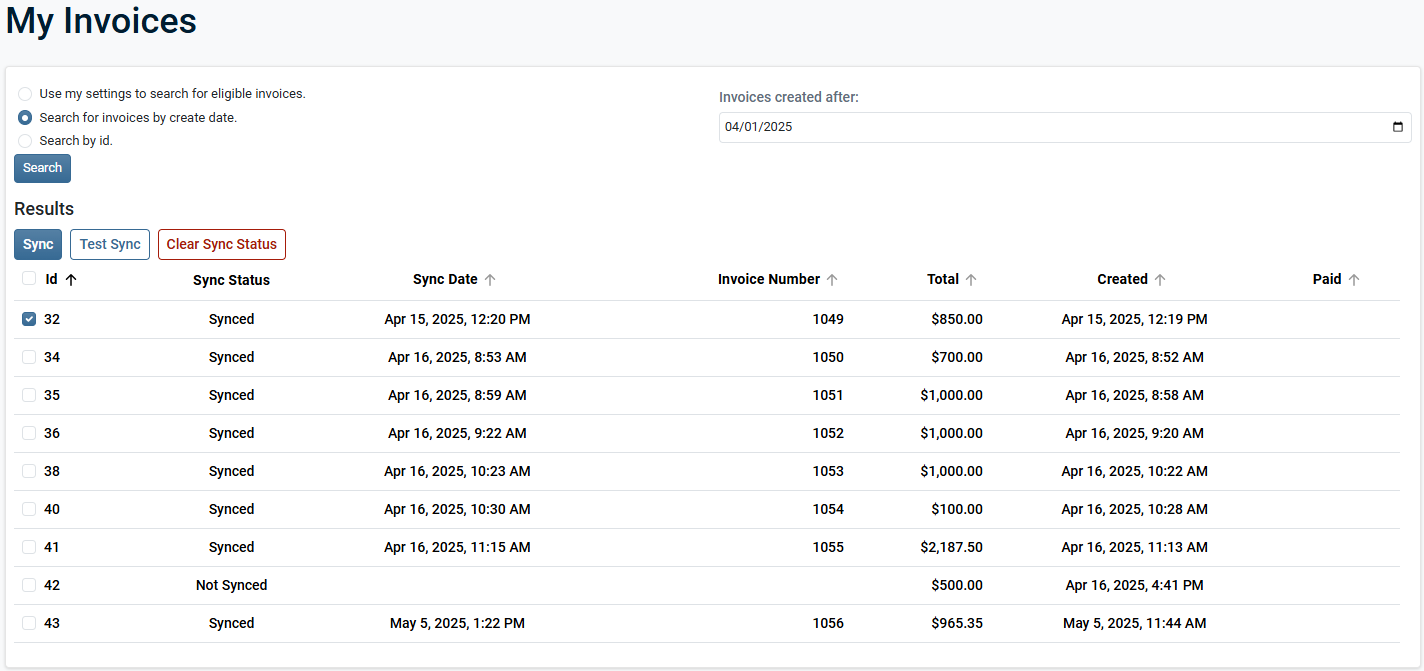
Invoices can be searched using three available options:
-
Use my settings to search for eligible invoices: Select this option to search only for invoices based on your current Invoice Max Age setting. Refer to Invoice Max Age.
-
Search for invoices by create date: Select this option to search for all invoices created after a specific date.
-
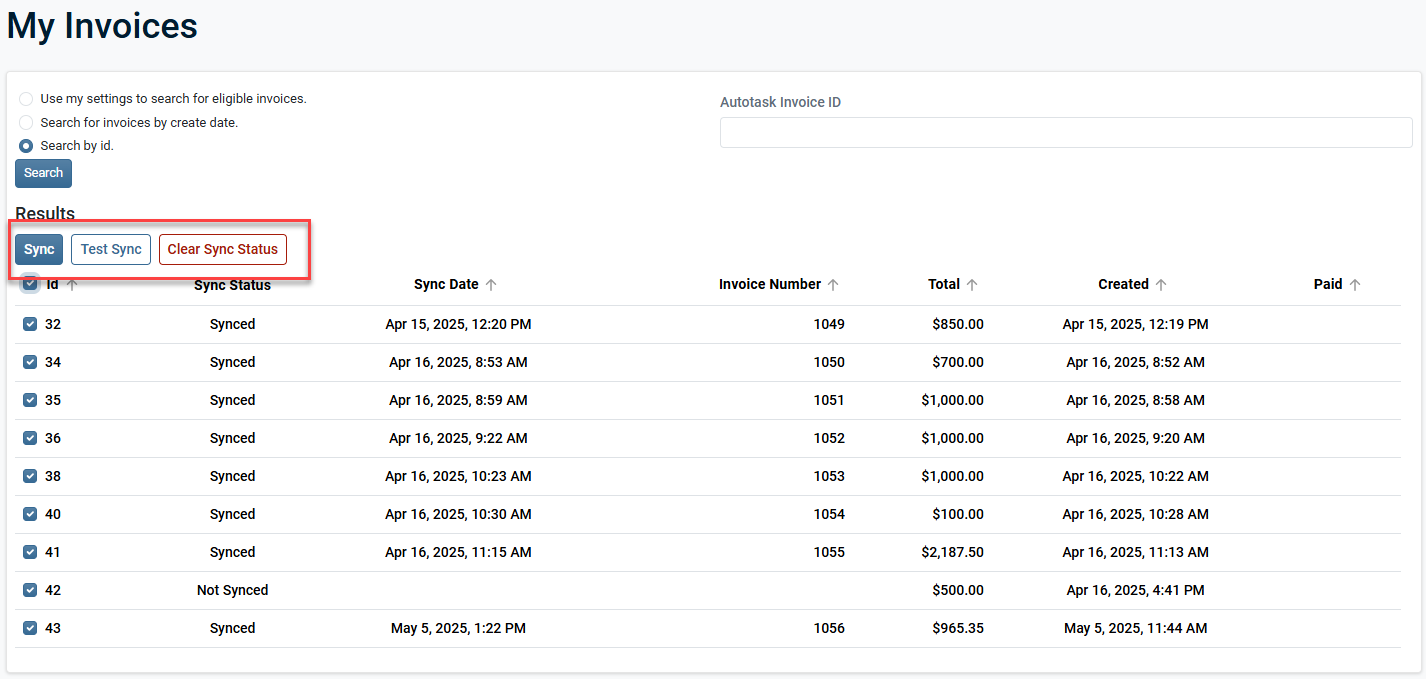
Search by ID: Select this option to search for a specific invoice by entering the Autotask invoice ID. The Autotask invoice ID number must be used and not the Autotask invoice number.
| Column | Description |
|---|---|
| Selection Checkbox |
Allows the selection of one or more invoices. |
| ID | Displays the associated Autotask Invoice ID number. |
| Sync Status |
Displays the sync status of invoices between Autotask and the Smart Accounting Hub.
|
| Sync Date | Displays the date the invoice synced (Web Service Date) to QuickBooks. |
| Invoice Number | Displays the assigned invoice number based on sync settings at the time. Refer to Invoice Numbering. |
| Total | Displays the total amount of the invoice at the time of the sync. |
| Created | Displays the date the invoice was created in Autotask. |
| Paid | Displays the date the invoice was marked as paid in QuickBooks. |
NOTE Columns can be sorted in ascending or descending order.
After performing a search, the Smart Accounting Hub lets you select one or more invoices to perform sync actions.
-
Sync: Select this option to initiate a sync of the selected invoice(s) to QBO.
-
Test Sync: Select this option to simulate a sync of the selected invoice(s) without creating an invoice in QBO. This will allow you to identify errors in your settings that may prevent a sync and is a safe way to test without overriding existing data in QBO.
-
Clear Sync Status: Select this option to clear the sync status of the selected invoice(s). Refer to Sync Status.
-
View Results: This option only appears after a manual sync has been attempted. Select this option to view the results of any attempted sync of an invoice. Once selected, the View Logs page is opened. Refer to View Logs for more information.
The My Purchase Orders page is dedicated to manually searching for one or multiple purchase orders for the purpose of syncing or re-syncing, if necessary.
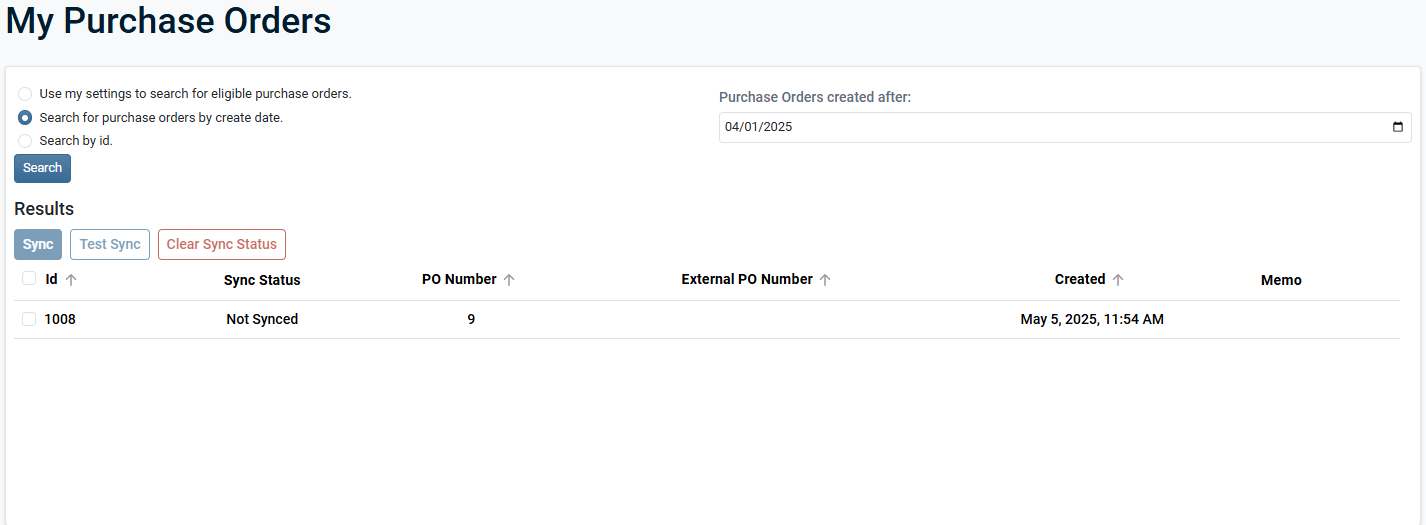
Purchase orders can be searched using three available options:
-
Use my settings to search for eligible purchase orders: Select this option to search only for purchase orders based on your current Purchase Order Max Age setting. Refer to Purchase Order Max Age.
-
Search for purchase orders by create date: Select this option to search for all purchase orders created after a specific date.
-
Search by ID: Select this option to search for a specific purchase order by entering the Autotask purchase order ID. The Autotask purchase order ID number must be used and not the Autotask purchase order number.
| Column | Description |
|---|---|
| Selection Checkbox |
Allows the selection of one or more purchase orders. |
| ID | Displays the associated Autotask purchase order ID number. |
| Sync Status |
Displays the sync status of purchase orders between Autotask and the Smart Accounting Hub.
|
| PO Number | Displays the assigned purchase order number based on sync settings at the time. Refer to Purchase Order Numbering. |
| External PO Number | Displays the associated external PO number from Autotask. |
| Created | Displays the date the purchase order was created in Autotask. |
| Memo | Displays the associated memo. |
NOTE Columns can be sorted in ascending or descending order.
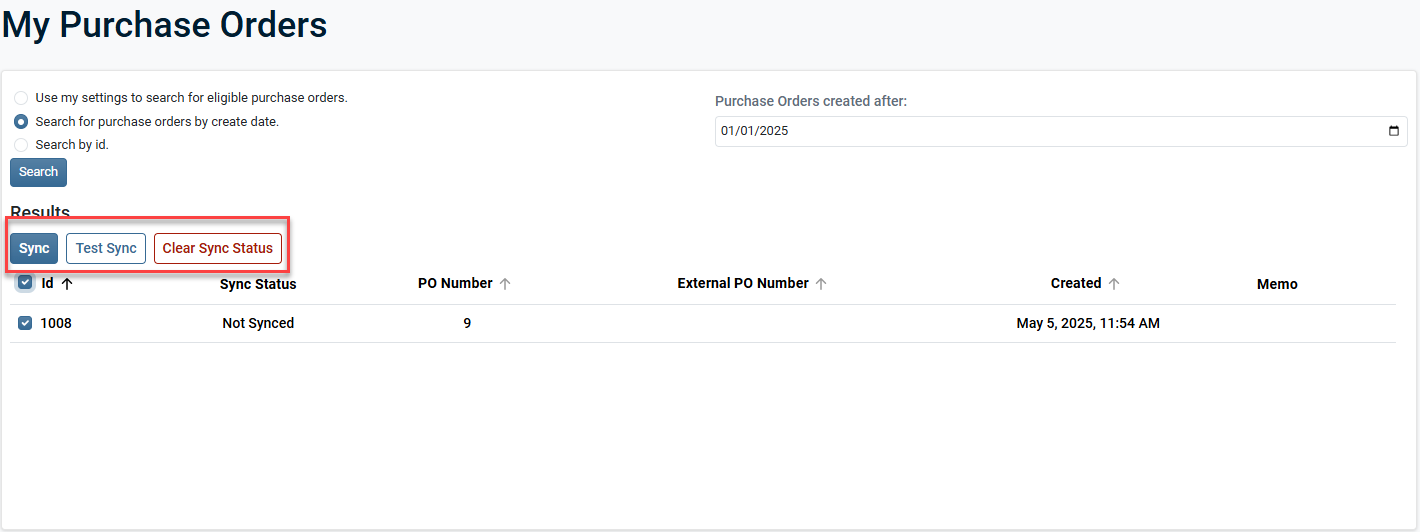
After performing a search, the Smart Accounting Hub lets you select one or more purchase orders to perform sync actions.
-
Sync: Select this option to initiate a sync of the selected purchasee order(s) to QBO.
-
Test Sync: Select this option to simulate a sync of the selected purchase order(s) without creating a purchase order in QBO. This will allow you to identify errors in your settings that may prevent a sync and is a safe way to test without overriding existing data in QBO.
-
Clear Sync Status: Select this option to clear the sync status of the selected purchase order(s). Refer to Sync Status.
-
View Results: This option only appears after a manual sync has been attempted. Select this option to view the results of any attempted sync of a purchase order. Once selected, the View Logs page is opened. Refer to View Logs for more information.
The My Expenses page is dedicated to manually searching for one or multiple expense reports for the purpose of syncing or re-syncing, if necessary.
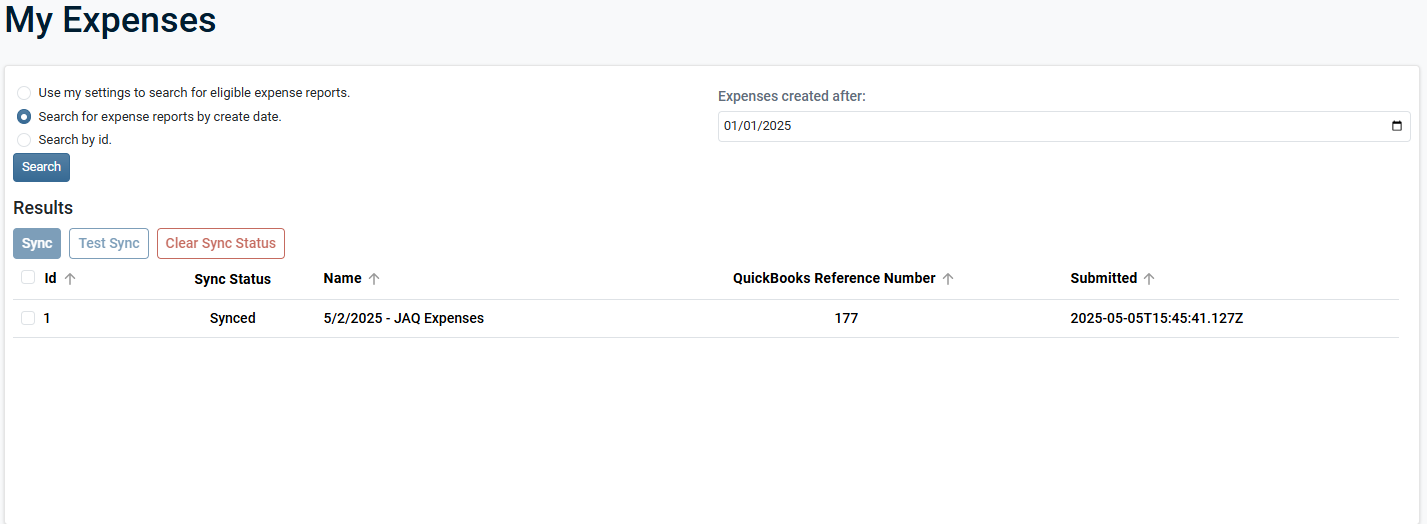
Expense reports can be searched using three available options:
-
Use my settings to search for eligible expense reports: Select this option to search only for expense reports based on your current Expense Report Max Age setting. Refer to Expense Report Max Age.
-
Search for expense reports by create date: Select this option to search for all expense reports created after a specific date.
-
Search by ID: Select this option to search for a specific expense report by entering the Autotask expense report ID number. The Autotask expense report ID number must be used and not the Autotask expense report number.
NOTE Columns can be sorted in ascending or descending order.
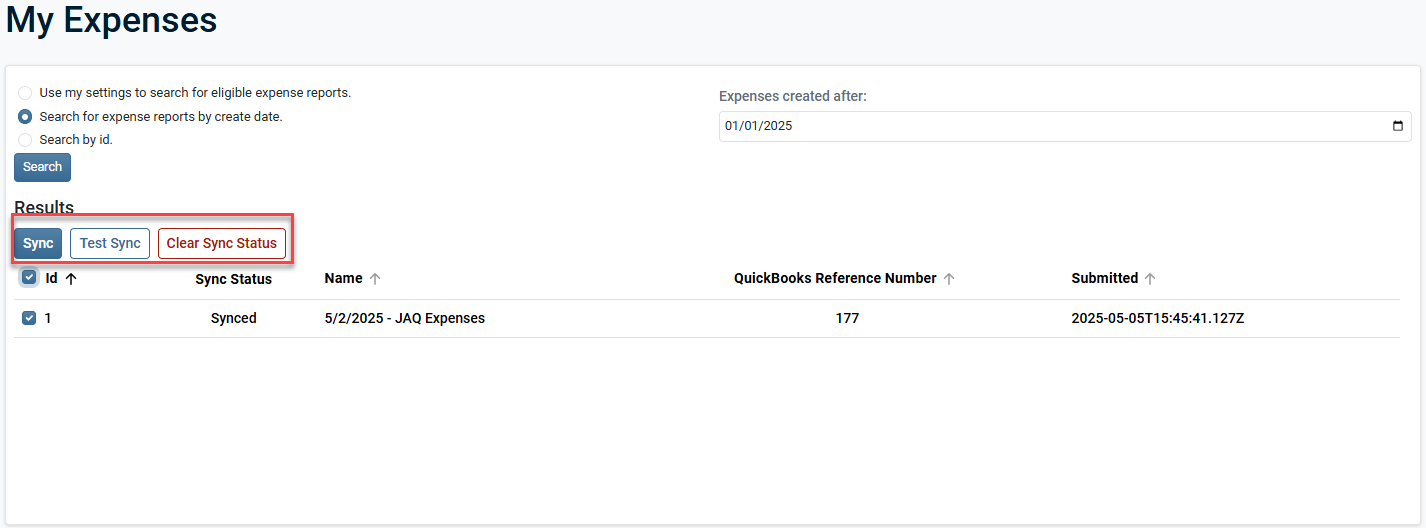
After performing a search, the Smart Accounting Hub lets you select one or more expense reports to perform sync actions.
-
Sync: Select this option to initiate a sync of the selected expense report(s) to QBO.
-
Test Sync: Select this option to simulate a sync of the selected expense report(s) without creating an expense report in QBO. This will allow you to identify errors in your settings that may prevent a sync and is a safe way to test without overriding existing data in QBO.
-
Clear Sync Status: Select this option to clear the sync status of the selected expense report(s). Refer to Sync Status.
-
View Results: This option only appears after a manual sync has been attempted. Select this option to view the results of any attempted sync of an expense report. Once selected, the View Logs page is opened. Refer to View Logs for more information.


