Mapping Lines of Business to Classes
By default, invoices and expense reports you transfer to QuickBooks Online are not filtered by line of business, and lines of business are not mapped to QuickBooks Online classes, but this is a configuration option in both the Invoice and Expense integration apps. In both apps, you can filter transactions by Autotask Division:Lines of Business and map Autotask Division:Lines of Business to QuickBooks Online Classes.
- You can filter by up to 10 lines of business.
- Multiple lines of business can be mapped to a single class.
IMPORTANT The two functions are tied together: to map Autotask divisions:lines of business to specific QuickBooks classes, you MUST select filtering.
NOTE The existing mapping of a resource's default department to a class in QuickBooks for the purposes of mapping an expense report to a QuickBooks class continues to be supported. Refer to Track resource departments using QuickBooks Online classes. However, if an expense report is directly mapped to a line of business, and the line of business is mapped to a class, that setting will always override the Department to Class mapping.
IMPORTANT Note that QuickBooks Online can be configured to associate classes at the line item level and at the transaction (invoice) level. The integration apps only support mapping lines of business to classes at the transaction level (i.e. one class per invoice). If your invoice contains items with different lines of business, the entire invoice is assigned the line of business of the first invoice item. 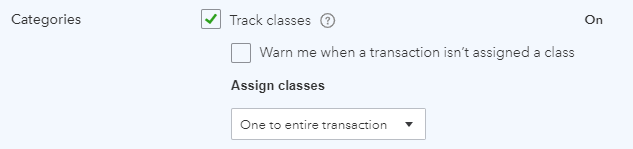
Setup in Autotask
In Autotask, do the following:
- You must set up the Divisions and Lines of Business in Autotask that are intended to be used for billing. Please read the documentation on Line of Business, and specifically Billing and Line of Business.
- The billing-specific lines of business must be assigned to the contracts that the labor or charges to be transferred to QuickBooks are associated with. Just creating the lines of business is not enough. It is the contract that applies the line of business to all billing items.
- When you generate invoices, you must make sure that all items on an invoice are associated with the same line of business. You can do this by filtering the Items to Invoice Page by Line of Business. Refer to Filter transactions to invoice.
NOTE If some items on a transferred invoice has a different line of business, in QuickBooks Online they will still be assigned the same class as the first item on the invoice.
Set up filtering and mapping in the Expense transfer and Invoice transfer apps
By default, all invoices and expense reports are transferred to QuickBooks Online, and not assigned to a class. For invoices, you can select a default class on the Settings page. Refer to Other Sync Settings.
IMPORTANT To map Autotask divisions:lines of business to specific QuickBooks classes, you MUST select filtering.
- To filter by line of business and map them to QuickBooks Online classes, select sync & map specific line(s) of business.
NOTE Only items associated with lines of business you select will be transferred to QuickBooks Online.
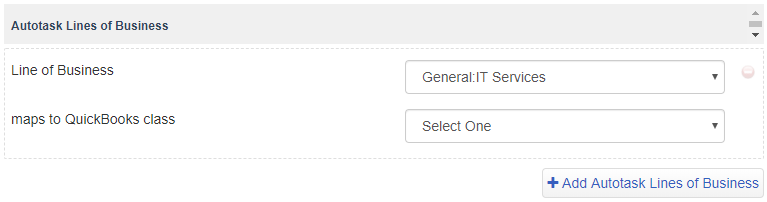
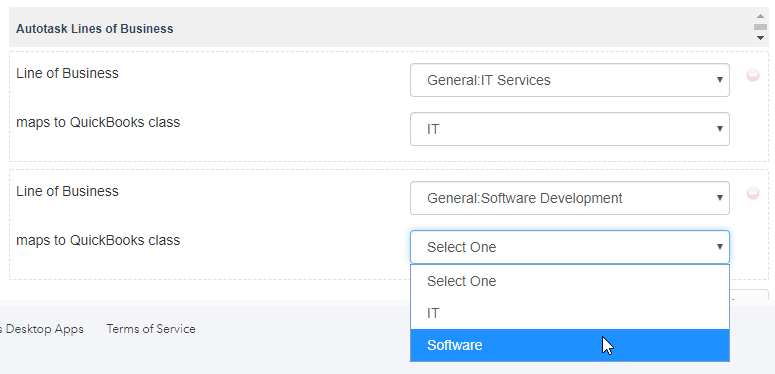
- Click +Add Autotask Lines of Business and select a line of business from the drop-down menu. You can add up to 10 lines of business to filter by and map to a class.
- Map each division:line of business to a QuickBooks class. Any lines of business that are not mapped to a class will default to the mapping selected on the Settings page.
- Click Save.


