Service Desk queues
PERMISSIONS Security level with Admin permission to configure Service Desk (Tickets). Refer to Admin security settings.
NAVIGATION Left Navigation Menu > Admin > Admin Categories > Features & Settings > Service Desk (Tickets) > Queues
About queues
Queues bring together tickets that have something in common, and resources who are assigned to monitor the queue and resolve the tickets placed into it. They are an essential ticket management feature.
- Resources can only work on tickets if they are assigned to at least one queue. You can do this on the Resources tab of the Edit Queue page, or on the Associations tab of the Resource Management page. Refer to Adding, editing, or copying a resource.
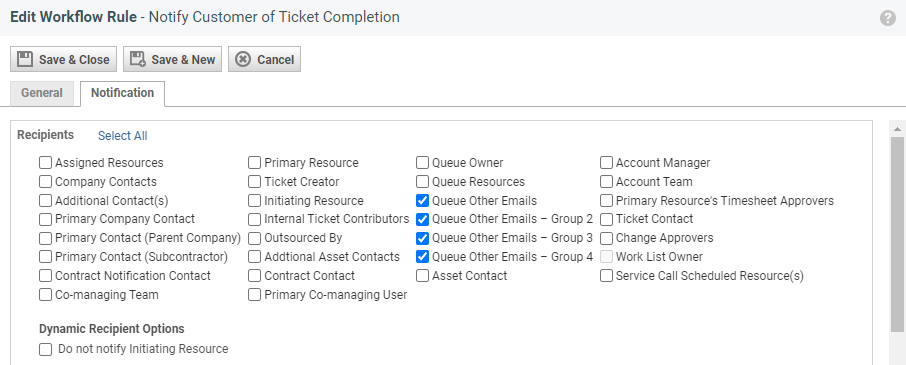
- You can also associate queues with a queue owner and additional email addresses, which will allow you to create workflow rules that automatically notify or assign tickets to the queue owner, or use those additional email addresses for notifications when a workflow rule is triggered.
Your Autotask instance is set up with a number of commonly used queues. The following queues are system queues:
- Client Portal
- Post Sale
- Monitoring Alert
System queues cannot be deactivated because some basic functions in Autotask depend on them, but they can be renamed. You can add any number of custom queues, and they can be inactivated, edited, and deleted as needed.
TIP Resources can access their assigned queues from the My Workspace & Queues page: My > Service Desk > Workspace & Queues. Refer to The My Workspace & Queues page.
How to . . .
-
To open the page, use the path(s) in the Security and navigation section above.
- Click New to open the New Queue page. To edit an existing queue, select Edit from the context menu.
- Populate or modify the following fields:
- Click New. A new line with an editable field is added to the table.
- Select a resource from the drop-down menu of all active resources in your Autotask instance. To add a new user from this window, click the plus icon.:
- Click Save to add the resource.
- Right-click a resource to edit or remove the resource combination from the queue.
| Column | Appears on Table | Description |
|---|---|---|
|
General tab |
||
| Name* |
The queue name is a required field. If this is a system queue, you will be able to rename it, but the original system queue name will be appended to the new name here. Throughout Autotask it will appear with only the new name. Queue names must be unique. |
|
| Active | A check mark indicates the queue is active. When adding a queue, this box is selected (active) by default. If this is a system queue, this field will be disabled. System queues cannot be inactivated. | |
| Internal Location* | The internal location that the queue is associated with. Internal locations are associated with time zones, so keep that in mind for Help Desk coverage. | |
| Number | Optional number you can use to identify the queue. | |
| Appears in Client Portal |
By default, the system Client Portal queue will appear in your Client Portal, but other queues can appear there, as well. If your Client Portal is activated, a check mark indicates that tickets placed in this queue appear in the Client Portal and can be viewed by your customer. On the ticket page, queues that appear in the Client Portal are identified by the "Queue visible" icon NOTE When this check box is clear, you cannot transfer tickets assigned to this queue to Taskfire. If you have a workflow rule set to transfer tickets to Taskfire, tickets from this queue will not transfer and there is no notification that the transfer did not take place. If you set automatic client notification for ticket transfers, the client will receive notification that the ticket is not available to the user or has been deleted. IMPORTANT Client Portal dashboards are not managed by this setting. Depending on how the dashboard widgets are set up, tickets in queues with this check box cleared may appear. For more information, refer to Client Portal dashboards. |
|
| Description | Describe the type of tickets that should be placed into this queue. | |
| Internal Location Address and Time Zone | Read only display of the address and time zone associated with your selected internal location. | |
| Other Emails (for notification), Other Emails Group 2 to 4 |
These fields allow you to enter up to 4 groups of emails, separated by comma or semi-colon, that are used with Service Desk Workflow Rule Notifications. You can enter emails into any field; you do not have to populate the Other Emails field first. When you create or edit a ticket workflow rule, these email addresses will be available for notification from the list of dynamic recipients when queue-related events occur. |
|
|
Resources tab |
||
| Resource Name |
|
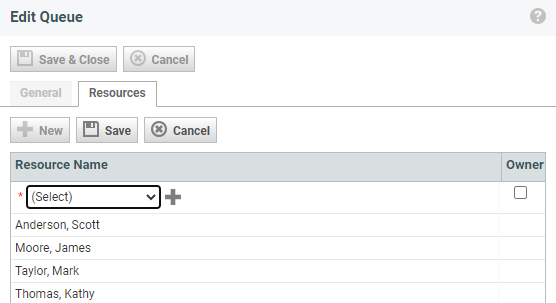
All resources already assigned to the queue are listed on the Resources tab. To add a resource to the queue: |
| Owner | Designating a resource as a queue owner is optional, but if you do, you can create workflow rules that notify the dynamic recipient "queue owner", or dynamically assign the queue owner as the ticket resource. It allows you to set up automatic ticket triage in Autotask. |
|
|
Service Desk Queues table only |
||
| Active Resource Count | Indicates the number of active resources assigned to monitor the queue. IMPORTANT Make sure at least one resource is assigned to each queue, or tickets placed into it will fall through the cracks! |
|
| System | Indicates that the queue is a system queue that cannot be deactivated or deleted. | |
-
Click Save & Close when done.
-
To open the page, use the path(s) in the Security and navigation section above.
- To open the queue for editing, open the context menu
 or right-click on the line and select Edit. Select the Resources tab.
 - All resources already assigned to the queue are listed on the Resources tab. To add another resource to the queue, click New. A new line with an editable field is added to the table. To edit an existing resource, click on the line with their name.
- Select a resource from the drop-down menu of all active resources in your Autotask instance. To add a new user from this window, click the plus
 icon.
icon.
- To make the resource a queue owner, select the check box in the Owner column. Designating a resource as a queue owner is optional, but if you select one, you can create workflow rules that notify the dynamic recipient "queue owner", or dynamically assign the queue owner as the ticket resource. It allows you to set up automatic ticket triage in Autotask.
- Click Save.
NOTE Resources can be assigned to multiple queues at one time from their resource record. For more information, refer to Complete the Associations tab.
Queues are set to active by default. Inactivated queues will keep their existing associations, but they cannot be selected on tickets going forward.
To inactivate or activate an existing queue, complete the following steps:
- To open the page, use the path(s) in the Security and navigation section above.
- Open the context menu
 or right-click on the line and select Edit.
 - Clear the Active check box to inactivate a queue. Select it to activate the queue. If this is a system queue, the Active check box will be disabled. System queues cannot be inactivated, but they can be renamed. The following queues are system queues:
- Client Portal
- Post Sale
- Monitoring Alert
-
Click Save & Close when done.
Queues can be deleted as long as they are not associated with any resources, tickets, recurring ticket templates, workflow rules, or Client Portal service requests. If you no longer wish to use a queue but it has existing associations, consider setting the queue to inactive instead. Inactivated queues will keep their existing associations but they cannot be selected on tickets going forward.
To delete a queue, complete the following steps:
- To open the page, use the path(s) in the Security and navigation section above.
- Open the context menu
 or right-click on the line and select Delete. If the queue has existing associations or is a system queue, the Delete option will not be available.
 -
Click Yes on the confirmation message.


