Managing Domain Settings
PERMISSIONS Security level with Admin permission to configure Email Notifications & Surveys. Refer to Admin security settings.
PERMISSIONS Permission to edit your company's DNS entry
NAVIGATION Left Navigation Menu > Admin > Admin Categories > Automation > Email Notifications & Surveys > Domain Settings
About the Domain Settings page
Starting with release 2023.3, only email addresses with a domain that has been validated can be used as Send from email addresses. To facilitate domain verification, we have consolidated it on a single page, the Domain Settings page. To open the page, use the path(s) in the Security and navigation section above.
On this page, administrators with the required permission can validate and optionally DKIM authenticate any domains that will be allowed to send emails from Autotask. Here, you can view the domains Autotask has discovered in your Autotask instance, manually add new domains, and manage the list of email domains that can generate outgoing emails from Autotask.
Only allowing the sending of emails and notifications from verified domains will enhance the overall security of the Autotask application. Spoofing of From: email addresses associated with outgoing emails will now be prevented.
The following Autotask email addresses are impacted:
- The Support Email Address. Refer to Configuring a support email address default.
- The Primary Email Address associated with Autotask user accounts. This email address can be used as the From: email address on a number of different pages and is usually listed as Send from Resource Email. Refer to Email Addresses.
- Alternate Send From Email Addresses (up to 5 per organization). Refer to Alternate Send From Email Addresses.
In addition to these widely available Send from email addresses, users can manually enter email addresses on notification templates, workflow rules, surveys, invoice emails, and contact groups. Prior to this security update, email addresses associated with an unverified domain could be entered. Going forward, any email addresses without a verified domain can no longer be used as the Send from email address.
The Domain Settings list contains the following columns:
| Column Name | Description |
|---|---|
|
Domain |
The top, secondary and any subsequent levels of the domain, essentially everything after the @ character in the email address. |
|
Active |
A check mark will indicate that the domain is currently active. Emails can only be sent from active domains. System domains cannot be deactivated. |
|
Support Email Address |
Identifies the domain that is used as your company's support email address. Refer to Configuring a support email address default. |
|
System |
The two system domains autotask.com and datto.com are configured by Kaseya. They are identified by a check mark and are DKIM authenticated. They cannot be edited or deactivated. |
|
DKIM Authenticated |
Contains a check mark for the system domains that are always authenticated, plus up to 5 additional domains that you have authenticated. |
|
Domain Verified |
The Domain Verified status can be:
|
Managing domains
The Domain Settings list menu contains the following options:
| Option | Description |
|---|---|
|
Authentication Details |
Selecting this option opens the Domain Authentication dialog window. Refer to Validating and authenticating domains. |
|
Disable / Enable DKIM Authentication |
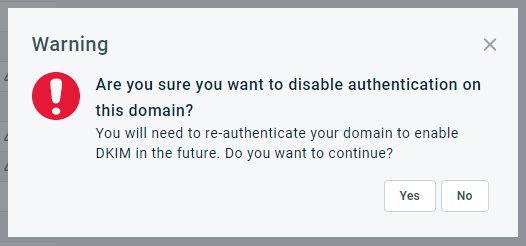
If, for any reason, you want to disable domain authentication for a domain, do the following:
For more about DKIM, refer to What is Domain Keys Identified Mail? |
|
Inactivate / Activate Domain |
Once a domain has been discovered in your Autotask instance or added to the list, it cannot be deleted. To prevent its use going forward, you can inactivate it. |
IMPORTANT The following is a general description of the formatting of a valid domain. It is not the same as a validated domain in Autotask. For that, refer to Validating and authenticating domains.
Domains are found based on the various email addresses entered and used within Autotask. The domain name starts after the @ character of an email address.
EXAMPLE johnsmith@mail.com
In this example, .com is the top-level domain; mail is the secondary level domain.
A valid domain must meet the following requirements to be available for authentication:
- The top level domain must consist of a minimum of two characters and a maximum of 6 characters (.io, .tv ). ICANN maintains a list of valid top-level domains.
- A . (period) before the top level domain
- A minimum of 1 and a maximum of 63 characters before the top level
- Use the English character set and contain only letters (a-z, A-Z), numbers (0-9) and hyphens (-), or a combination of these
- Begin with a letter or a number and end with a letter or a number, not a hyphen (-)
- Not contain a hyphen in the third and fourth positions (e.g. www.ab- -cd.com)
- Not include a space (e.g. www.ab cd.com)
- Not include an underscore (e.g www.ab_cd.com)
EXAMPLE Examples of valid domains:
ato.io
100Man.tv
support.mymsp.
psa.datto.com
my-msp.co.uk
llanfairpwllgwyngyllgogerychwyrndrobwllllantysiliogogogoch.co.uk (Guinness Certified World's Longest Domain Name)
EXAMPLE Examples of invalid domains:
.com (secondary domain missing)
a.c (not a valid primary domain)
joe smith.com (space in the secondary domain)
-joe.co (hyphen in the first position of the secondary domain)
msp-man-.com (hyphen in the last position of the secondary domain)
To proactively add a domain to the list, do the following:
- From the Left Navigation Menu > Admin > Admin Categories > Automation > Email Notifications & Surveys > Domain Settings
- Click New. The Add a Domain dialog box will appear.
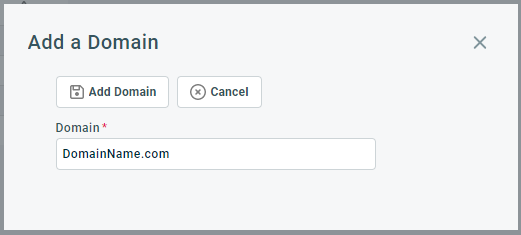
- Enter the domain name. Refer to Managing Domain Settings
- Click Add Domain. The Domain Authentication dialog window will appear.
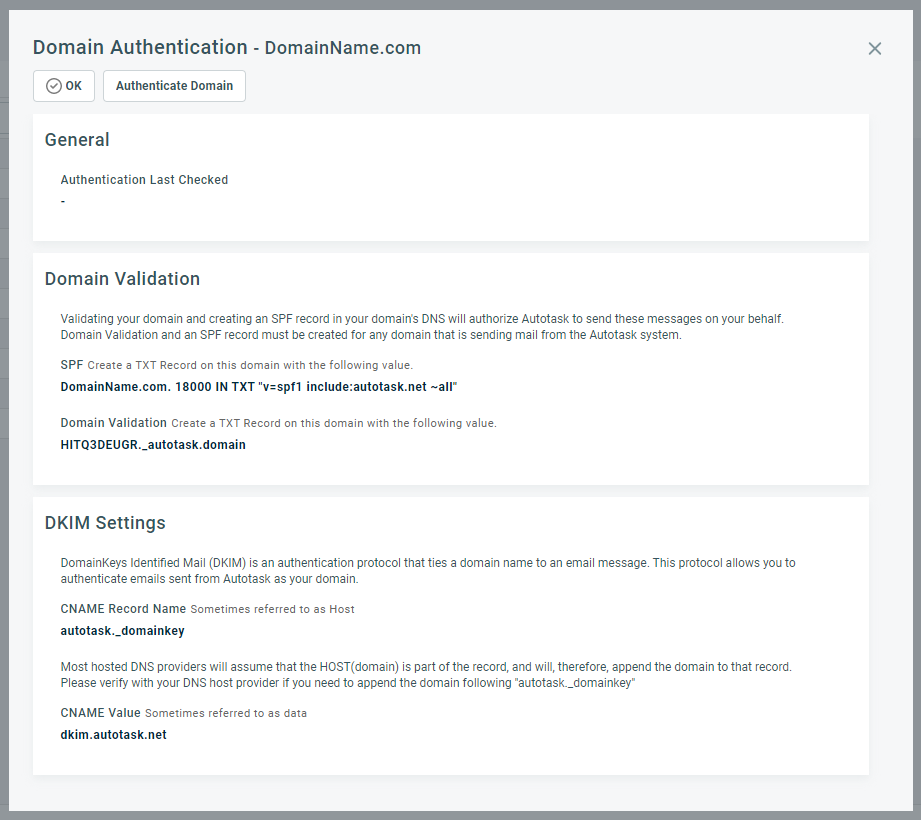
NOTE The domain name must be unique.
For next steps, refer to Validating and authenticating domains.
Validating and authenticating domains
To validate and optionally authenticate a domain, you must enter information from the Domain Authentication dialog window into your company's DNS entry.
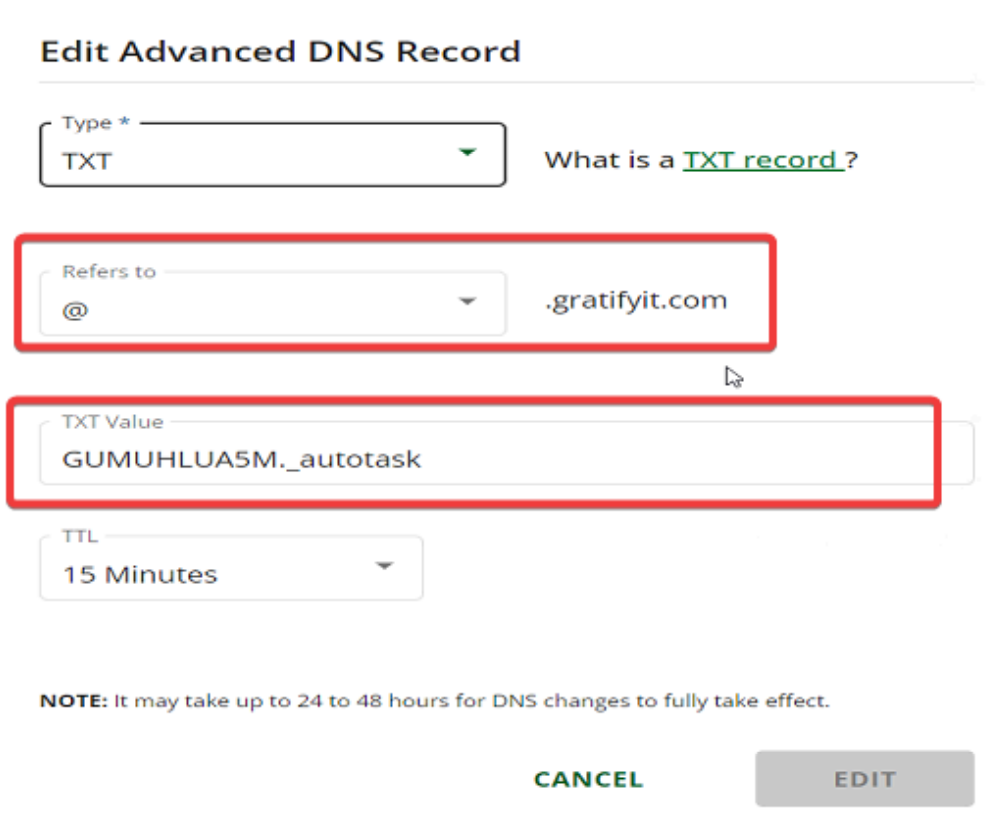
- Domain validation is required for all email domains that will send email from Autotask. It consists of entering two TXT records into the DNS, the SPF and the Domain Validation TXT record.
- DKIM domain authentication is optional. It adds an extra layer of security, but you are limited to 5 domains in addition to the two system domains that are already authenticated.
NOTE Depending on your DNS provider, field names and input formats may vary, though they are typically labeled “Name” and “Host.”
To validate and optionally DKIM-authenticate your domain, do the following:
- On the Domain Settings page, select Authentication Details from the context menu or from the Add a Domain dialog box, click Add Domain. The Domain Authentication dialog for the selected domain will appear.

- Open your company's DNS record.
- From the Domain Validation section, copy the following strings and paste them into your company's DNS record:
| Record | Name Field | Value |
|---|---|---|
|
Domain Validation (Required) |
||
|
TXT |
[Your Domain Code]._autotask |
Enter either a blank space, a period ("."), or the word "Name", as required. |
|
TXT (SPF) |
Retain the existing content |
v=spf1 include:autotask.net ~all NOTE For the SPF record, ensure that include:autotask.net is listed among the first three entries if the record is lengthy. The tilde (~all) is important for proper validation; however, if your DNS provider requires it, Autotask can also authenticate with a dash (-all). If the dash does not work, we recommend changing it back to a tilde. |
IMPORTANT Please note that domain authentication in Autotask PSA may take anywhere from 5 minutes to 48 hours. This process cannot be expedited by Autotask PSA Support.
- Close the Domain Authentication dialog window.
- After the entered records have had a chance to propagate (depending on the service provider, up to 48 hours), open the window again and click Authenticate Domain.
- If the authentication failed, an error message will indicate a reason. Authentication may fail because you did not allow enough time, or because you have reached the 5-domain limit. It is also possible that the validation will succeed, but the DKIM Authentication will fail. The error message will indicate if it is a validation or a DKIM error message.

You should wait 48 hours and then try again. - Close the dialog.
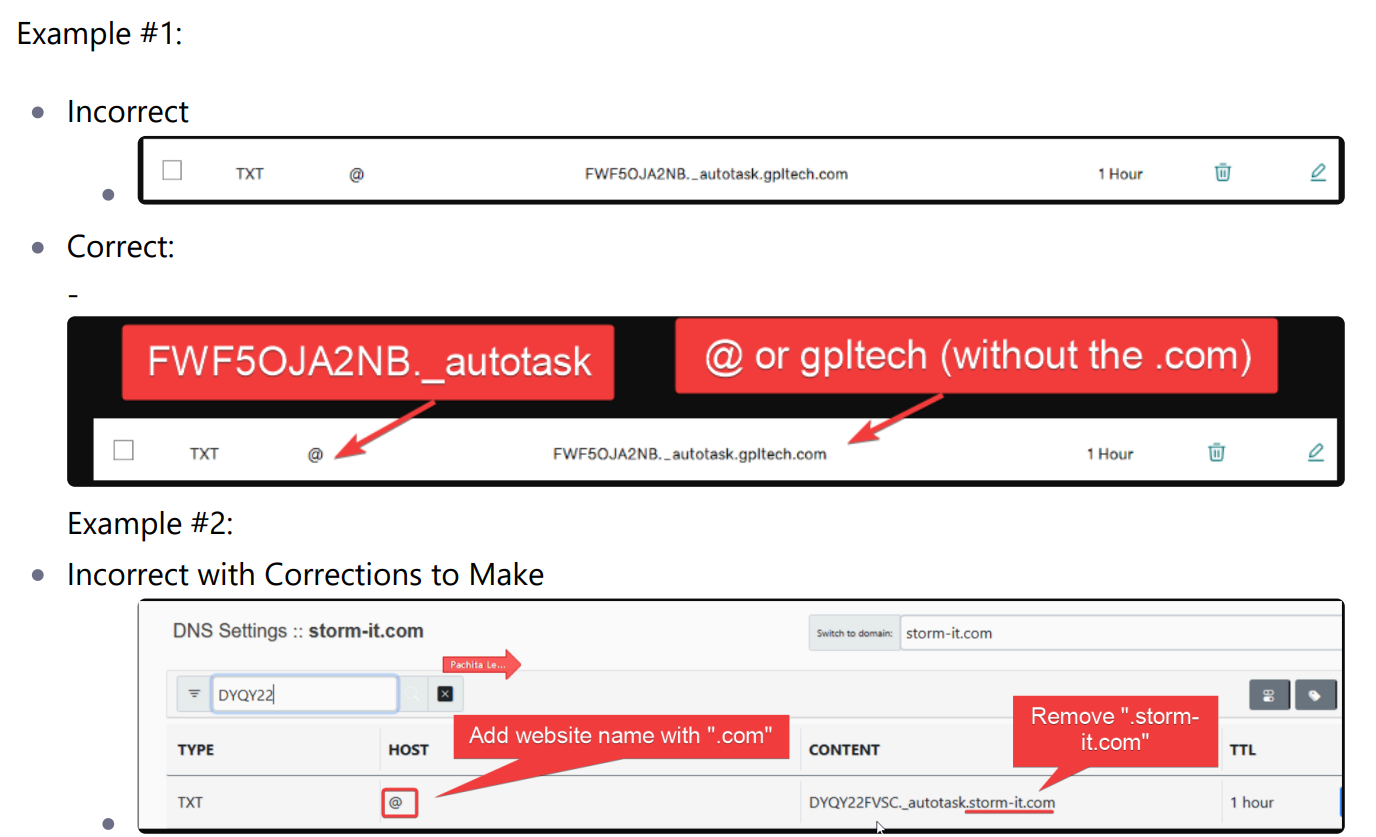
Below are examples from popular DNS providers demonstrating correct and incorrect methods for entering information to validate and authenticate domains in Autotask PSA.
GoDaddy (with similar interfaces and functionality to NameCheap, PorkBun, and cPanel)
Network Solutions
DKIM (Domain Keys Identified Mail) is an email authentication technique that allows the recipient to check that an email was indeed sent and authorized by the owner of that domain. This is done by giving the email a digital signature. This DKIM signature is a header that is added to the message and is secured with encryption.
Once the recipient determines that an email is signed with a valid DKIM signature, it’s certain that parts of the email among which the message body and attachments haven’t been modified. The validation is done on the server level, so DKIM signatures are usually not visible to end-users.
Since DKIM authentication provides a higher level of trust, implementing the DKIM standard will result in more emails getting delivered.
