Creating or editing a LiveLink
PERMISSIONS Requires Administer LiveLinks permission, assigned through the LiveLinks Designer Security Policies tab.
NAVIGATION Left Navigation Menu > Admin > Admin Categories > Automation > AutoForms & LiveLinks > LiveLinks Designer > LiveLinks tab
NAVIGATION Left Navigation Menu > Home > View > LiveLinks tab
TIP Some programming knowledge is required to create more complex LiveLinks.
Creating or editing a LiveLink
To create or edit a LiveLink, do the following:
- To open the page, use the path(s) in the Security and navigation section above.
To add a LiveLink, click New.
To edit a LiveLink, locate it in the list of LiveLinks, right-click, and select Edit LiveLink.
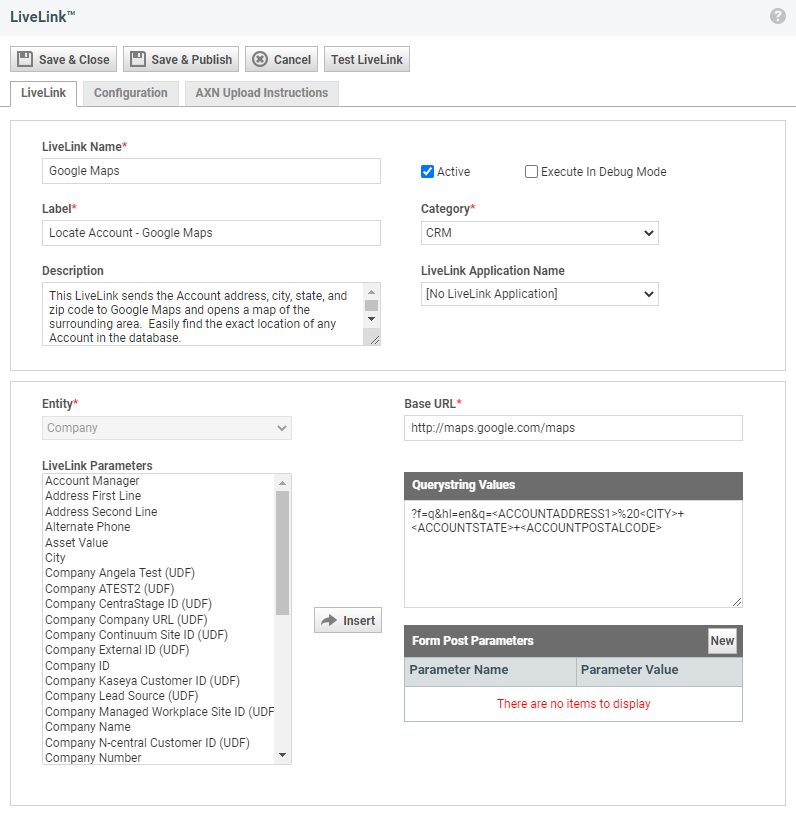
- On the LiveLink tab, populate the following fields:
LiveLink tab
Field Description LiveLink Name A descriptive name for the new LiveLink.
NOTE In the Autotask user interface, the Label field will appear, not the LiveLink Name.
Active When selected, the LiveLink is active. Only active LiveLinks are displayed in Autotask and can be executed by the users they have been published to.
By default a new LiveLink is active. You may want to clear the check box to deactivate a new LiveLink until you are ready for it to go live.Execute in Debug Mode Check the check box to execute in debug mode.
This is a great way to confirm that the querystring contains the correct parameters. When this check box is selected, the controls that allow you to execute the LiveLink are displayed in Autotask, but instead of the actual application or web site, the link opens a page that displays general information about the LiveLink and the data the parameters returned.
Refer to Executing the LiveLink in Debug mode.Label Enter a label that will identify the LiveLink wherever it appears in the Autotask user interface. It should be descriptive to provide some insight about what the LiveLink does. Category The Category determines how the LiveLink will be listed in the AXN Catalog. It is one of the fields users can search when they are looking for LiveLinks.
To assign a category, select from the drop-down list of the following categories provided by Autotask:
• Accounting
• Communities
• CRM
• Managed Services
• Other Extensions
• Project Management
• Quoting and Purchasing
• Sales
• Service Desk
• Tech ToolsDescription Enter a description of the LiveLink that will appear in the LiveLinks Designer table and in the Autotask Extend Catalog. LiveLink Application Name Applications are only necessary if the LiveLink requires authentication. You may want to assign one anyway, because it will help you categorize your LiveLinks. The application will also appear in the AXN Catalog, if you decide to upload your LiveLink. You can reuse application definitions without having to recreate them for each LiveLink. If the list does not contain the application you need, you can add an application from the LiveLinks Designer. Select the application that the LiveLink is associated with. Refer to Creating LiveLinks applications.
Entity If the LiveLink is meant to pass data from Autotask entities like Organizations, Contacts, or Devices to an external application or web site (if the LiveLink is “context sensitive”), you must select the Entity here in order to access all available parameters associated with that entity. By default, No Entity is selected.
Select an Entity and click OK to display the list of that Entity’s parameters. If the Entity uses UDFs, the UDFs show up in the parameter list. Entities that might contain UDFs include Organizations, Devices, Products, Projects, and Contacts.NOTE You cannot change the Entity once you save the LiveLink. Be sure to select the correct entity before you click Save.
If the LiveLink is not context-sensitive (associated with an entity), only the following parameters are available in the LiveLink Parameters selection list:
• Autotask Username
• Application Username (only for LiveLinks associated with an application that requires authentication)
To specify the parameters to pass to the remote application, select a parameter from the list and click Insert to move the parameters to the Querystring Values box.LiveLink Parameters This list is contingent on the Entity selected in the Entity field. It contains a list of fields from the selected entity, plus the generally available parameters. NOTE As part of our ongoing process to ensure the security of your data, Autotask Password and application passwords are not available as parameters for any Entity type. To pass username information for a LiveLink, create a LiveLink Application. Refer to Creating LiveLinks applications.
IMPORTANT For security reasons, the LiveLinks Application Password variable is not available by default for use as querystring values or post parameters, while the Username variable is. Existing LiveLinks containing the password variable have been inactivated. You can choose to override this system setting. Refer to Allow password variable in LiveLinks.
Click in the Querystring box where you want to insert the parameter. Select a field from the Parameters list and click the Insert button, or double-click the field, to add a parameter to the querystring. When the LiveLink is executed, the value from that field is passed to the external web site or application. LiveLink parameters are usually embedded in a querystring (see below). A parameter set is not required, but without one, no data is passed to the external web site or application.Base URL Enter the URL for the application or web site the LiveLink will open. To find the Base URL, open the web site or web application and navigate to the page to which you want to link.
For example, to create a LiveLink that performs a Google search on an organization, open a browser and go to www.google.com. If you enter “acme manufacturing” in the search field and click Search, the search results page for that organization will display. The URL in the browser now contains: http://www.google.com/search?hl=en&q=acme+manufacturing.
This indicates that the Google search accepts search values in a querystring. This is not uncommon on web sites that are used to retrieve information. If the search value is not contained in the URL, the search values must be submitted via a form post.NOTE If you are creating a LiveLink to point to an area within your Autotask instance, the base URL does NOT need to include https://www.autotask.net.
Correct: /opportunity/accounts/Account.asp??1=1
Incorrect: https://ww3.autotask.net/opportunity/accounts/Account.asp??1=1Querystring Values If the URL accepts querystring values, everything to the left of the question mark, that is, http://www.google.com/search is the Base URL for this LiveLink. The rest of the address is the querystring. You would then copy the querystring, that is, ?hl=en&q=acme+manufacturing into the Querystring Values pane underneath, and highlight (select) your search string (“Acme Manufacturing”), and replace it with the LiveLink parameter that will contain the value the LiveLink will search for. The finished querystring will look like this: ?hl=en&q=<ACCOUNTNAME>
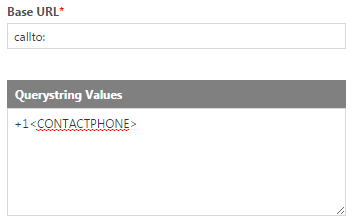
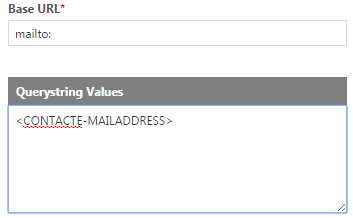
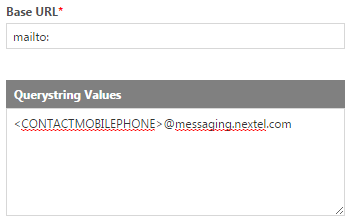
When a user executes this LiveLink, for example from an organization page, the Organization Name, that is, <ACCOUNTNAME>, will be passed to Google and the search results will be displayed. In addition to the HTML protocol, LiveLinks support Mail, Instant Message, and VoIP protocols, as well. Refer to Base URL and Querystring Examples below.
All these LiveLinks are already published on the AXN Catalog and can be downloaded from there.NOTE For LiveLinks that open a LiveReport in Autotask, you must include the report ID and two additional settings, issystemreport=True and ispublishedreport=True. For example, if your report id is 12, the Querystring value would be "?reportid=12&issystemreport=True&ispublishedreport=True".
Form Post Parameters While some websites allow users to pass information in a querystring, this can present a security concern, because the information is transmitted “on the outside of the envelope”. Also, most Web servers tend to restrict the size of the URL query string, so that lengthy form values passed via a querystring can be truncated.
The POST method, which sends form data in the HTTP request body, can send a virtually unlimited number of characters to a server. The data is not openly transmitted over the Internet; it is passed in the body of the request (inside the envelope). Most web sites that require any kind of login will use the FORM POST method for this reason. Refer to Building a form post LiveLink below.NOTE As part of our ongoing process to ensure the security of your data, Autotask Password and application passwords are not available as parameters for any Entity type. To pass username information for a LiveLink, create a LiveLink Application. Refer to Creating LiveLinks applications.
Configuration tab
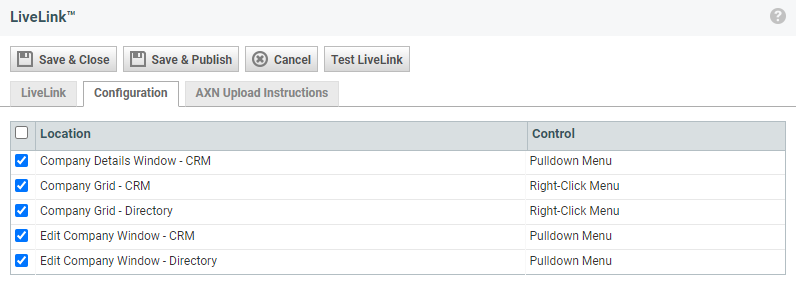
On this tab, you select the locations where the LiveLink will appear. The available Location choices are specific to the entity associated with the LiveLink. LiveLinks that are not associated with an entity are added to the LiveLinks menu in the top navigation bar. When the LiveLink is published, it becomes available in the selected locations.
- Select a check box to pick a location where the LiveLink is to be published.
TIP LiveLinks can be added to the Knowledge Base menu on the Ticket page when you want to link to external knowledge bases, such as the Microsoft Developer Network (MSDN).
- To test your LiveLink, click the Test LiveLink button. Refer to Testing the LiveLink below.
- If you are ready to publish the LiveLink, click Save and Publish. Refer to Publishing LiveLinks. To publish the LiveLink later, click Save & Close.
More...
While some web sites allow users to pass information in a querystring, not all do because of security implications. Querystrings can present a security concern, because the information is transmitted “on the outside of the envelope." Also, most Web servers tend to restrict the size of the URL query string, so that lengthy form values passed with the GET method via a querystring can be truncated. If querystrings are not a good fit for your LiveLink, you can use a Form Post LiveLink instead.
The following form post example creates a LiveLink that will log you into a desktop sharing application called LogMeIn. The LogMeIn form is looking for three inputs:
- The user’s email, which serves as the user ID
- A password
- A click on the Log Me In button
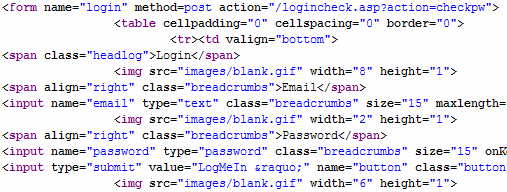
To find the parameter names this application uses, you can right-click the web site and select View Source from the sub-menu. The default text editor opens, displaying the source code for the page. Use the Find command and search for the text string <form. You will see something like this:
To build the form post LiveLink
- Find the string that begins with action=, in the example, "/logincheck.asp?action=checkpw"
- Append the contents inside the quotation marks, /logincheck.asp?action=checkpw , to the base URL.
- In the lines following the string <form, search for <input. This will identify the user input the form is looking for, and therefore the Form Post Parameters that you need to insert into the LiveLink. In the example, there are 3 input names. Note that the input name may not be the first parameter name that appears; input type (button, password) may be listed first.
The input names will become the Form Post Parameter Names.
- Click the New button to add a row to insert a parameter.
You can insert any number of rows at any time. Unused rows will be deleted when the LiveLink is saved.
- Enter the input names from the target web site into the Parameter Name fields.
The corresponding Parameter Values maybe a specific string (called a literal). In our example, the parameter value for the “button” parameter is a literal, “LogMeIn”. The literal value can be found by looking for “value=”.
TIP Form posts are not always straightforward. You may need to experiment to get the correct values. Use the Test LiveLink option and, if needed, ask for assistance from developers in your company or the developers of the target Web site.
- If the parameter value is a variable, such as a user name, you must insert the corresponding Autotask parameter from the list of LiveLink Parameters. To insert a LiveLink parameter, click your cursor in the Parameter Value column at the exact location of desired entry. Next, select the correct LiveLink parameter from the LiveLink Parameters pane. Then double click the parameter, or, click the parameter and then click the Insert button. The parameter is inserted in the Parameter Value column.
As best practice, test a newly created or edited LiveLink before you publish it.
- Click the Test LiveLink button on top of the LiveLink Editor page.
This opens a window that contains an editable table with two columns, LiveLink Parameter and Value. You or another LiveLinks Administrator can check the parameters and values.
- Click the Try it Now button.
The values are passed in through the LiveLink. If the test is successful, the remote site or application launches.
Executing the link in Debug mode is a great way to confirm that the querystring or form post values contain the correct parameters. When this check box is selected, the controls that allow you to normally execute the LiveLink are available in Autotask. But, instead of launching the actual application or web site, the control opens a page that displays general information about the LiveLink and the querystring or form post values.
General information
This section displays the LiveLink Name, Description, Application if any, the associated Entity, and the Base URL. If the LiveLink uses a querystring, the querystring is displayed with parameters and again with the actual values. If the LiveLink does not contain a querystring, no data displays for Querystring: and Querystring with Values:.
If the LiveLink uses Form Post, there is a link, Preview HTML Forms, located next to Form Post:. If the LiveLink does not use form post, the link is replace by N/A.
Parameter results
The Parameter Results table lists every parameter present in the LiveLink along with the parameter’s value, and whether it is used in a form post or querystring.
View form post data
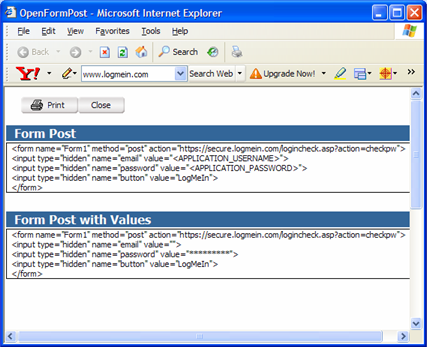
When the user clicks the Preview HTML Forms link, the form post data opens in a new window.
- The Form Post area shows the form post with the unparsed LiveLink parameters.
- The Form Post with Values area shows the form post with the parsed LiveLink parameters.
Edit the LiveLink data or turn off Debug mode
If you need to make changes to the LiveLink, you must edit the LiveLink in the Edit LiveLinks window. Even if there are no changes to make, the LiveLink cannot execute while in Debug mode. You must clear the Execute in Debug Mode check box in the Edit LiveLink window.
If you have permission to edit LiveLinks, you can access the Edit LiveLink window from the Debug Mode window.
- Click the LiveLink link in the message that appears at the top of the Debug mode window.
If you do not have permission to Edit LiveLinks, there is no LiveLink link in the message at the top of the page. Instead the text indicates that you must contact a LiveLinks Administrator. Any LiveLinks Administrator with permission to edit LiveLinks can open the Edit LiveLink window.
NOTE ww*.autotask.net must be added to your browser’s list of Trusted Sites for Debug Mode to function properly.
