Task & ticket priorities
PERMISSIONS Security level with Admin permission to configure Service Desk (Tickets). Refer to Admin security settings.
PERMISSIONS Security level with Admin permission to configure Projects & Tasks. Refer to Admin security settings.
NAVIGATION Left Navigation Menu > Admin > Admin Categories > Features & Settings > Service Desk (Tickets) > Task & Ticket Priorities
NAVIGATION Left Navigation Menu > Admin > Admin Categories > Features & Settings > Projects & Tasks > Task & Ticket Priorities
Priorities play a vital role in managing tasks and tickets:
- Ticket priorities impact ticket routing and the automation of your ticket workflow. The ticket priority indicates the urgency of the service request or incident, and determines ticket due dates in service level agreements.
- Task priorities indicate the urgency of the task within the project workflow. They help you determine how and where to allocate your resources.
- Workflow rules use both task and ticket priorities. Priorities can act as both conditions and updates.
Autotask includes four basic priorities in the following colors: Critical: red; High: green; Medium: orange, and Low: dark gray. The default colors and icons can be edited.
-
To maintain consistency in your automated processes, we recommend that you use ticket and task categories to assign priorities to tickets and tasks.
-
On Client Portal tickets, priority is determined by the Request Type's ticket category.
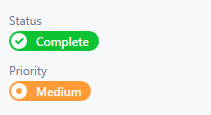
To easily identify priorities on ticket pages and in lists and assess their level of urgency, you can assign both a color and an icon to each priority. The priority will display in the selected color on the ticket page and in ticket lists. The icon will display, in the priority's color, on the ticket page and on ticket cards on boards.
Most ticket lists with a column chooser will include a Priority Icon column in the chooser.
On boards, the priority icon will appear in the selected color on the ticket card. Refer to Understand the card display.
Service Desk Notification Templates provide a variable, Ticket: Priority Color, that you can add to the HTML code of notification templates. This variable allows you to color-code text or other elements of the notification based on a priority's color. Unlike other notification variables, you must add this variable and supporting HTML code in the HTML editor. Some knowledge of HTML styles is required. Refer to Using the Ticket: Priority Color variable.
How to . . .
- To open the page, use the path(s) in the Security and navigation section above.
- To add a new priority, click New. A row is inserted at the bottom of the list.
- To edit an existing priority, select Edit from the context menu or click in the row.
- Populate or edit the following fields and click Save:
| Icon | Name | Description | New or Edit Mode |
|---|---|---|---|
| Icon | Displays the current icon selected for the Priority in the color specified for the Priority. | Click to open the icon picker and select an icon.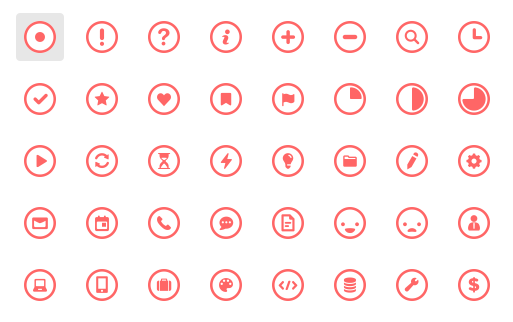 |
|
| Color | Displays the color selected for the Priority. Defaults to gray. |
Click to open the color picker and select a color. |
|
| Priority Name (required) |
Priority name | Enter a name or edit the current name. | |
| Active | A check mark indicates the Priority is active. Active priorities are available for selection in menus in the interface. |
Select the check box to activate, or clear the check box to inactivate. |
The order in which priorities appear on this page will control the order in which they appear in selector lists throughout Autotask. If you use the priority field as a row or column in boards, priorities will appear in the order set here.
Additionally, there is an SLA system setting that relies on the priority sort order when recalculating SLA targets. This is done using the sort order of priorities in the table, and the reason why you should sort the priorities from lowest to highest. Refer to Recalculate SLA targets for events that have already been met/missed when ticket Priority is edited (targets that have not been met/missed will always be recalculated).
To change the display order, click on the order column of the priority you want to move and drag the row to the appropriate location.

When a priority is inactivated, it will no longer be available for selection going forward, but existing associations will remain in place.
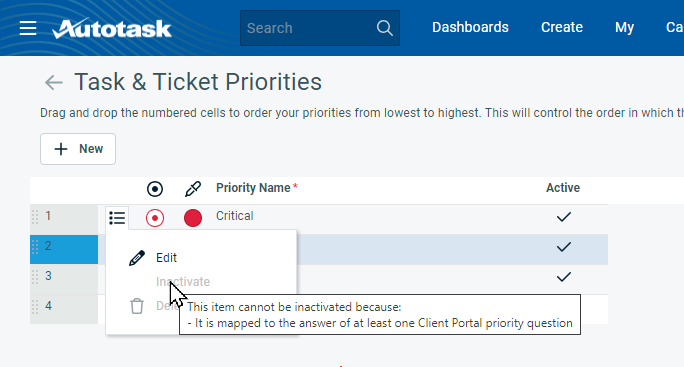
To activate or inactivate a priority, click the context menu![]() and select Activate or Inactivate. If the priority cannot be inactivated, the option will not be available to you. You can hover over the option to see why you cannot inactivate the priority.
and select Activate or Inactivate. If the priority cannot be inactivated, the option will not be available to you. You can hover over the option to see why you cannot inactivate the priority.
To delete a priority, click the context menu![]() and select Delete. Priorities that have been used on tasks or tickets cannot be deleted. Instead, they can be inactivated so they are no longer available for selection.
and select Delete. Priorities that have been used on tasks or tickets cannot be deleted. Instead, they can be inactivated so they are no longer available for selection.


