Approving or rejecting timesheets
PERMISSIONS Timesheet approvers
NAVIGATION My > Waiting My Approval > Timesheets
NAVIGATION Left Navigation Menu > Timesheets > Waiting For My Approval > Timesheets
NAVIGATION Left Navigation Menu > Timesheets > Search > Timesheets > Common Filters > Timesheets Waiting My Approval
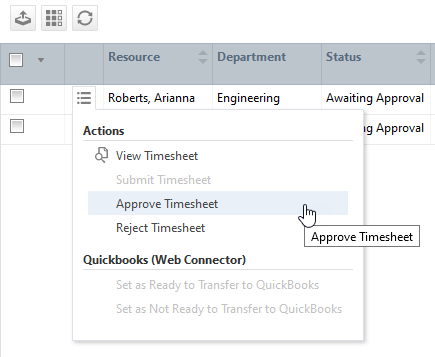
NAVIGATION Timesheets widgets > context menu > Approve Timesheet or Reject Timesheet
TIP Widgets based on the Timesheets entity have both Approve Timesheet and Reject Timesheet options in the context menu of grid type widgets and the drill in grids of other widget types. Approve timesheet permissions apply.
Time approval features
Timesheets do not have to be submitted by your resources or approved by a timesheet approver. You can ignore the entire workflow and still bill your customers for labor, or track labor costs against a contract. But if you skip this step, you should be aware of the following:
- You will be generating billing items that will appear on customer invoices without review
- Without constant reinforcement, the amount of time your users will track, and you will therefore be able to bill your customers, is almost certainly going to decline. This can have a significant financial impact.
- The quality of the data that flows into resource utilization, workload, and profitability reports, the tools you need to manage your business, might be impacted
Best practices
We recommend that you set up time tracking and approval workflows to be as streamlined as possible.
- You can exempt all resources except the users who generate billable labor, that is, your technicians, from submitting a timesheet. You do this on the Security tab of the Resource Management page by selecting the Resource is not required to Submit Timesheets check box. Refer to Complete the Security tab.
- All billable time is tracked as a time entry on either a task or a ticket anyway. You may not want to require that your resources track time for non-billable activities such as internal meetings.
- There is a contract setting that allows you to combine the timesheet approval and financial approval steps. Refer to Billing settings for approving labor. This way, you need to review the same time entry only once.
- While you can have up to 3 tiers of timesheet approvals with multiple approvers at each level, most smaller companies do fine with one tier, and one or two approvers.
How to...
To approve or reject a timesheet, do the following:
- To open the page, use the path(s) in the Security and navigation section above.
- To approve or reject a timesheet sight unseen, select the appropriate option from the context menu.

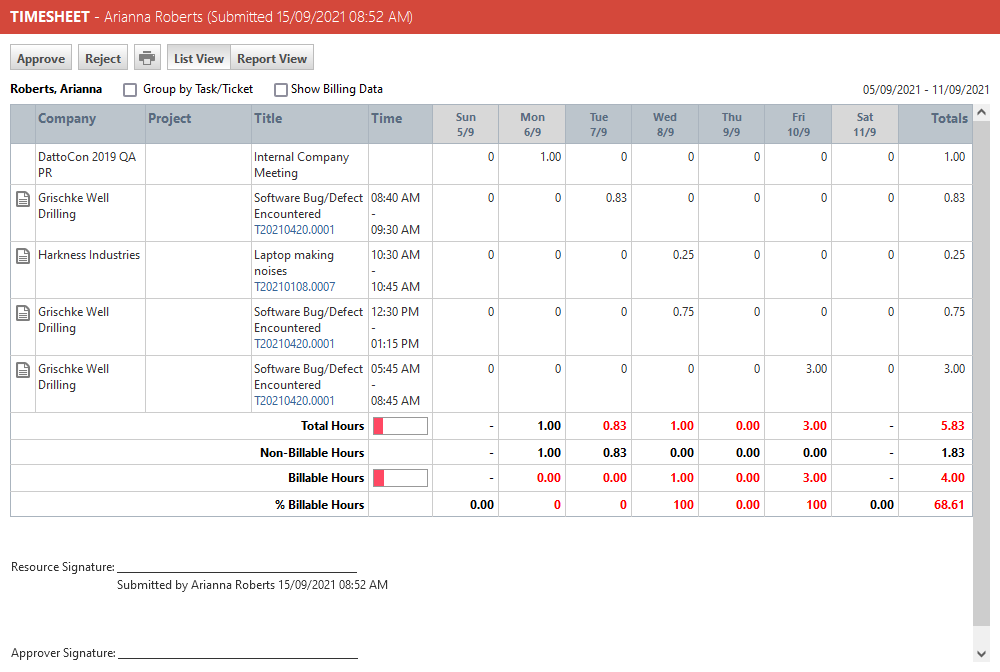
- To open the timesheet for review, select View or View Timesheet from the context menu. The selected timesheet will open.

- For a more in-depth review of a time entry, click the ticket or task number in the Title column to open the ticket or task associated with the labor entry. If you have proxy time entry permissions, you can modify the labor entries you are approving. Refer to Add, edit, or delete time entries for other resources.
- Approve or reject the timesheet, using the following buttons and check boxes:
| Button or box | Description |
|---|---|
|
Tool buttons |
|
|
Approve (List View only) |
Click this button to approve the timesheet. The approver's name and the approval date/time appear in the timesheet header, below the signature line in the Timesheet Report view, and on the Timesheet History table. |
|
Reject (List View only) |
Click this button to reject the timesheet. Enter a reason for the rejection, then click Send Rejection, or click Cancel Rejection. To reject a previously approved timesheet, go to Left Navigation Menu > Timesheets > History > Submitted Timesheets. You can also approve timesheets from this page. For details, refer to Managing submitted timesheets. NOTE When a timesheet is rejected, Autotask will automatically send a notification email to the resource. |
|
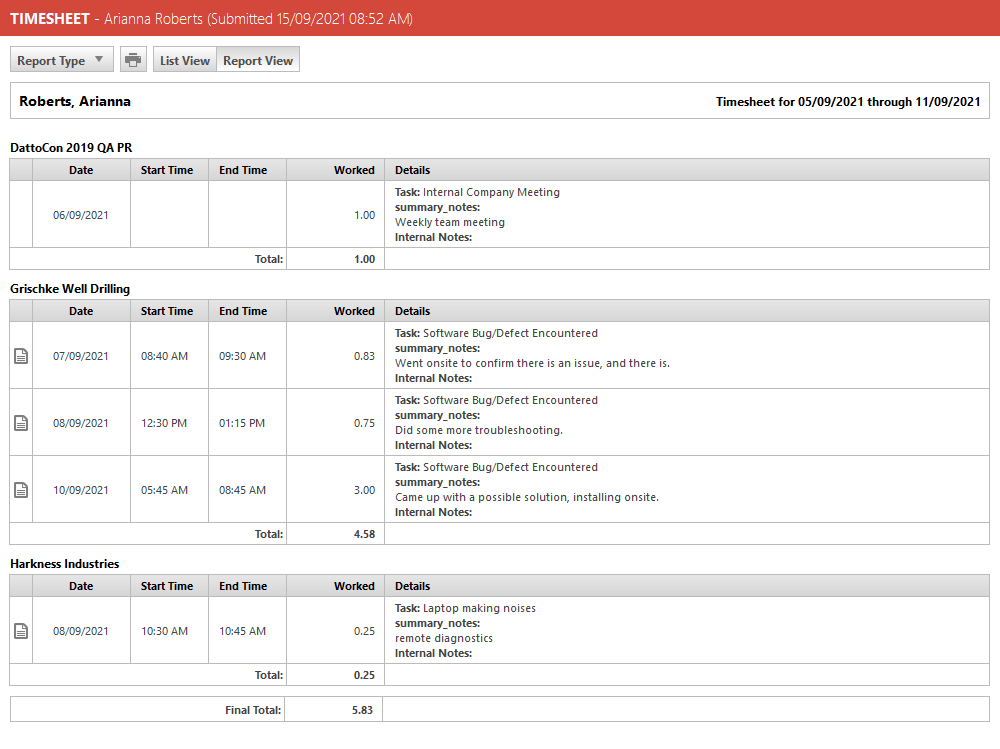
Report Type (Report View only) |
The entries on the timesheet can be sorted in different ways to facilitate the review. Options are:
In the Report View, you can see time entry details, including Summary Notes and Internal Notes. |
|
Click this button to launch the Print dialog for the current view. |
|
|
List View, Report View |
Click these buttons to toggle between List View and Report View. |
|
Check boxes |
|
| Group by Task/Ticket |
Select this box to sum up all time entries for one time item (internal time, task, or ticket) in one line. The line displays the total hours worked on that item each day, and the total hours worked on that item for the current timesheet period. |
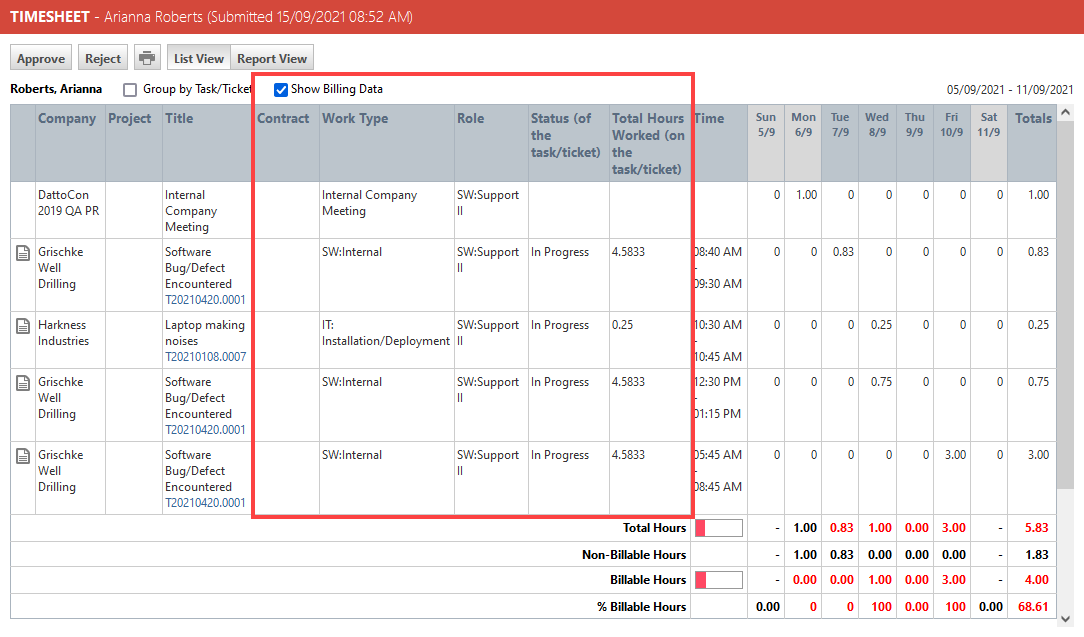
| Show Billing Data |
Select this box to insert the following additional columns between the Title and Time columns:
This check box is especially important if you commonly use the On timesheet approval setting on contracts, and approving the time will also be the financial approval for the time entries. Refer to Billing settings for approving labor. For this scenario, you may want to enable proxy time, so the approver can edit the individual time entries. Refer to Add, edit, or delete time entries for other resources. IMPORTANT If you have also selected the Group By Task/Ticket check box, and the grouped items have multiple values for Contract, Work Type, or Role, the single, grouped line shows only the billing data values for the first item in the grouping. |
- To open the page, use the path(s) in the Security and navigation section above.
- Select the check boxes for the timesheets you wish to approve or reject, or select the check box in the column heading to check all boxes.
- To approve the selected timesheets, hover over the context menu and select Approve Selected Timesheets.
- To reject the selected timesheets, select Reject Selected Timesheets, enter a reason for the rejection, then click Reject.
NOTE Any items on any timesheet which were set to post On timesheet approval will be processed by Autotask behind the scenes. You will not have to wait until this process is complete.
By default, users can add, edit, and delete only their own time entries. Your Autotask administrator can enable timesheet approvers, or both timesheet approvers and administrators, to enter time and submit time off requests on other users' behalf. For users who have proxy time entry permission, the Proxy Time Entry section and the Resource selector field will appear on all time entry pages, so they can create a time entry for another user. They can also view users' unsubmitted timesheets.
Proxy time entry is enabled through a system setting. Refer to Proxy time entry.
IMPORTANT To enter time, approvers must have permission to view the tasks and tickets in question.
Timesheet approvers will find these reports helpful:
- Unsubmitted Timesheets (Timesheets > Reports) report shows which timesheets have not yet been submitted for a specific time period. You can view by approver, by department or by resource. If a resource is missing timesheets, you can use the “Notify” button to send them a reminder email requesting the timesheet. You can send it to an individual, or to all resources.
- Timesheet History by Resource (Reports > Time and Expenses > Timesheets) allows you to see time entries on timesheets that are not yet submitted. This is a good way to review work if you are not using proxy time entry. If you are using proxy time entry, you'll also be able to review the work on the timesheet itself.
- Widgets based on the Timesheets entity Add Timesheets widgets to a dashboard tab. There are two preconfigured Timesheet widgets in the widget library (Timesheets waiting my approval (year to date) or Unsubmitted timesheets by resource (year to date). You can modify them to display different data, or create your own widgets. Refer to About dashboard widgets.


